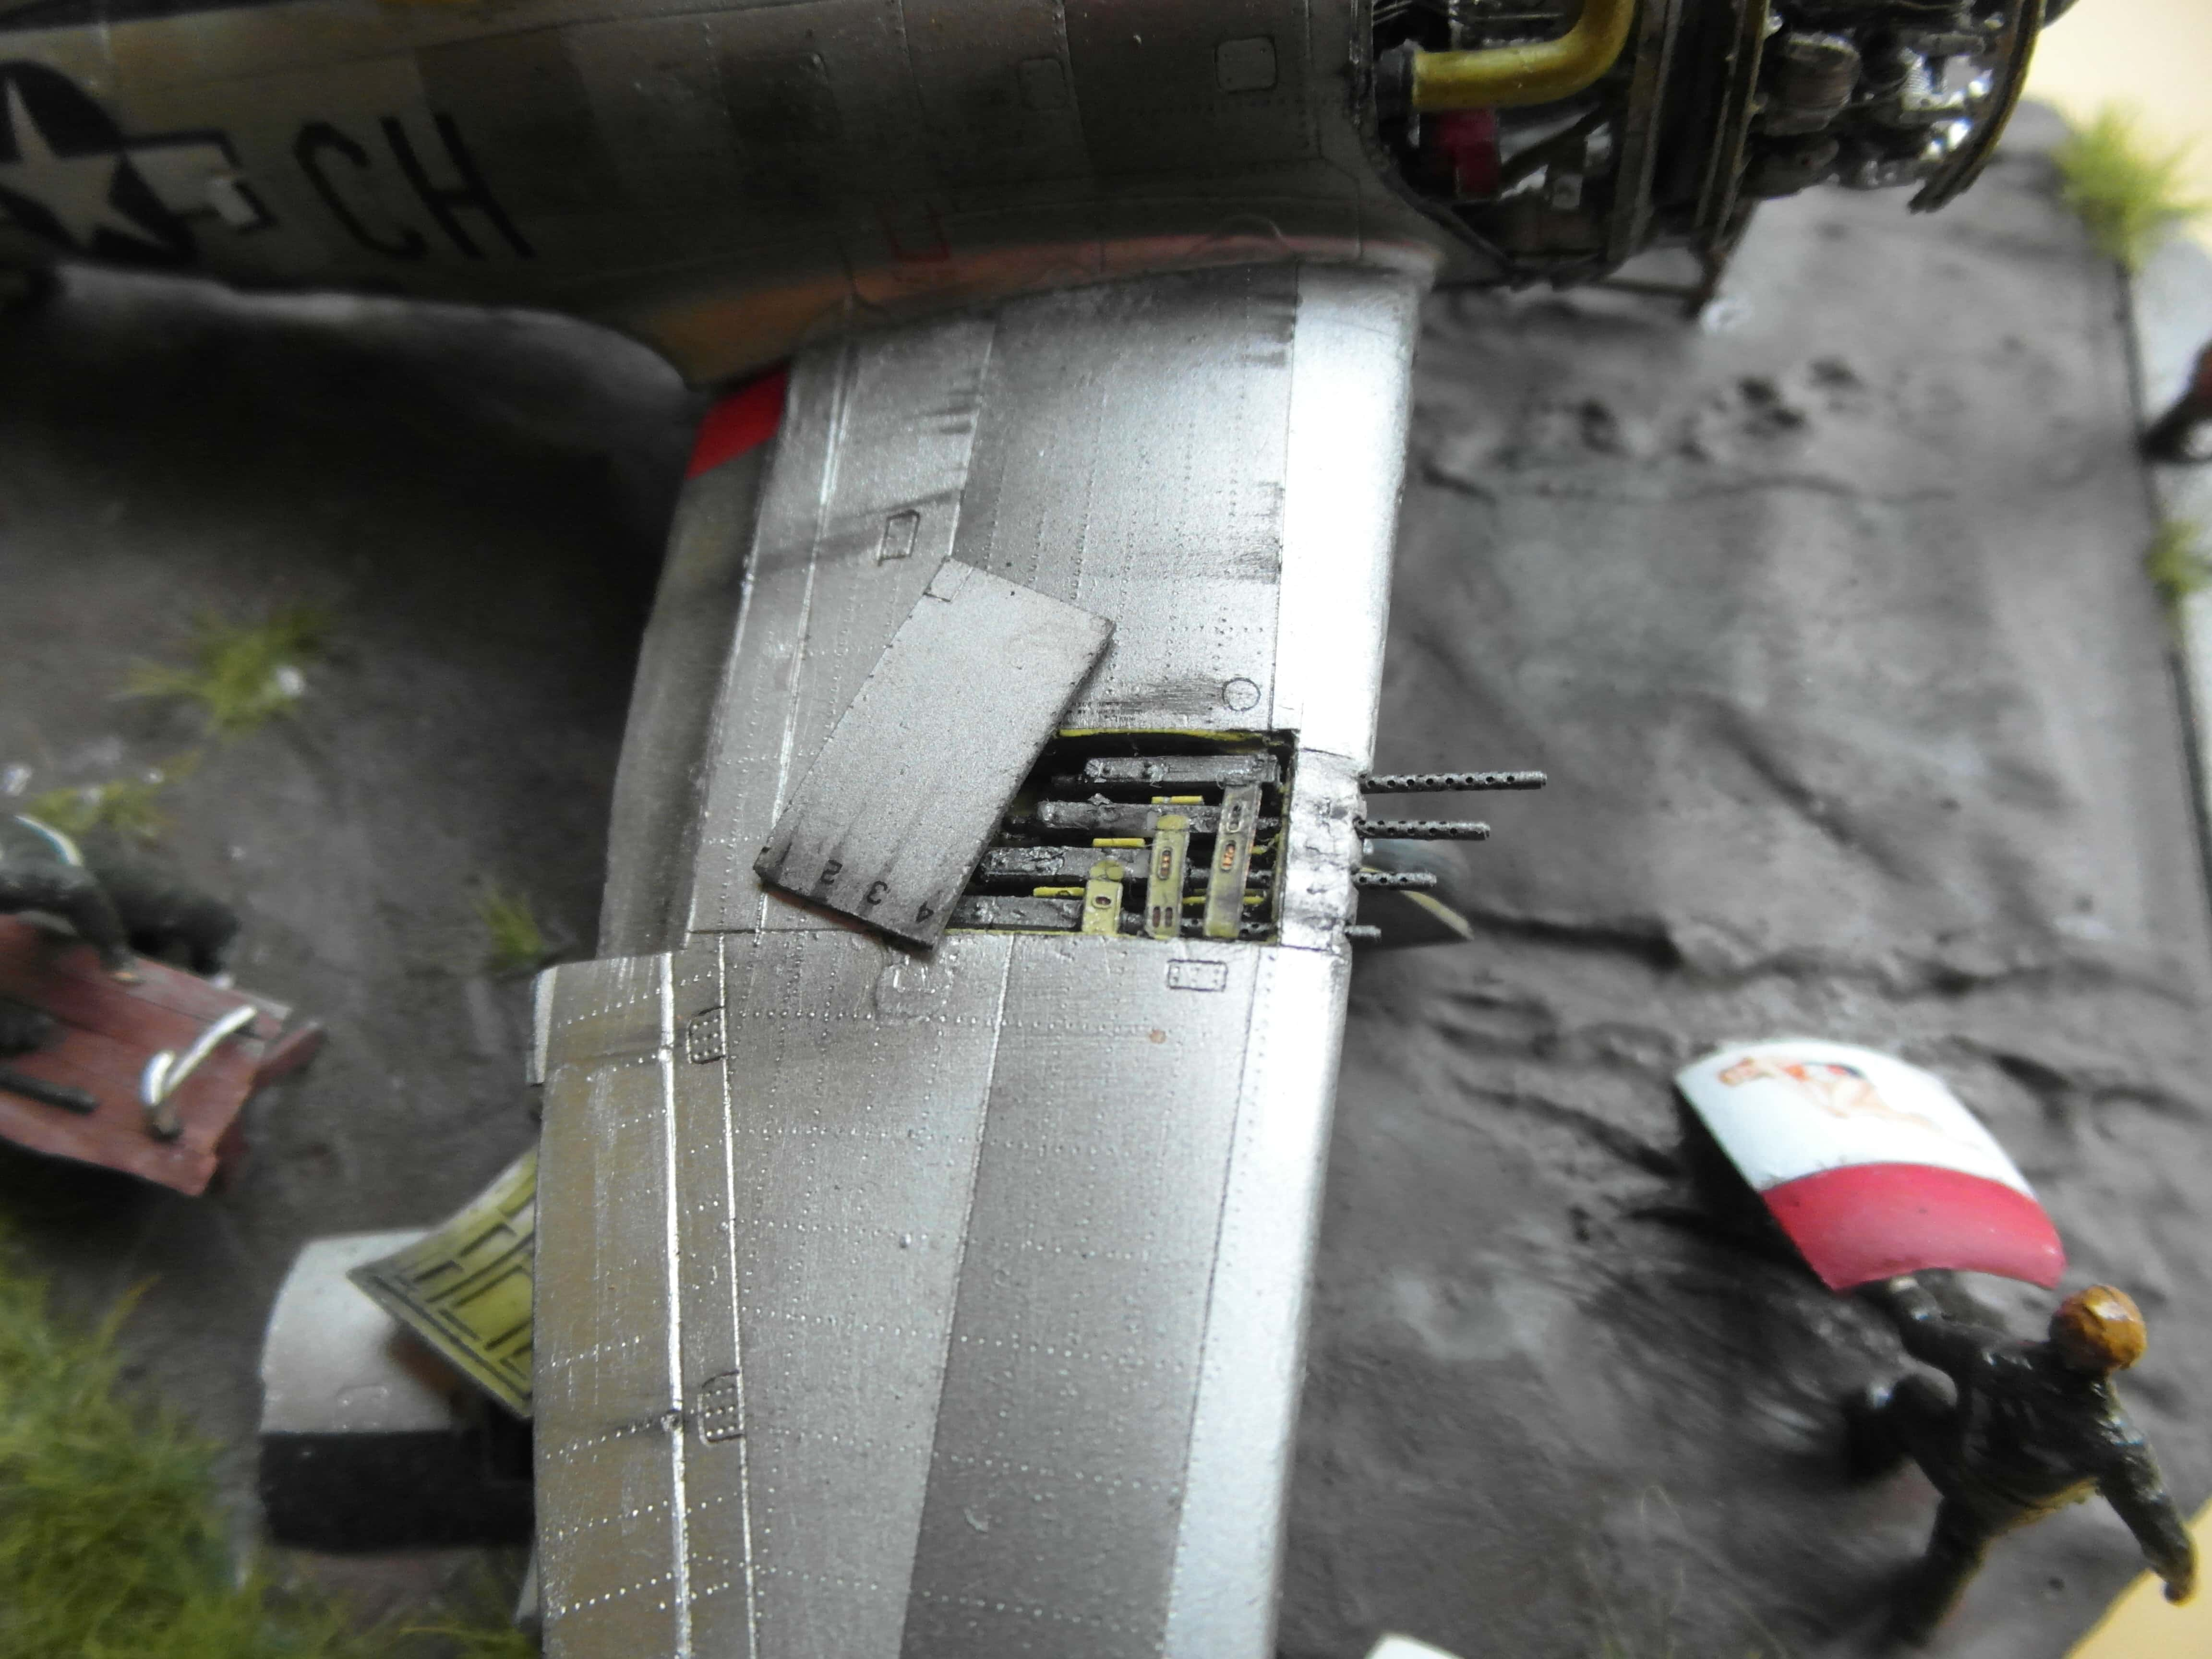
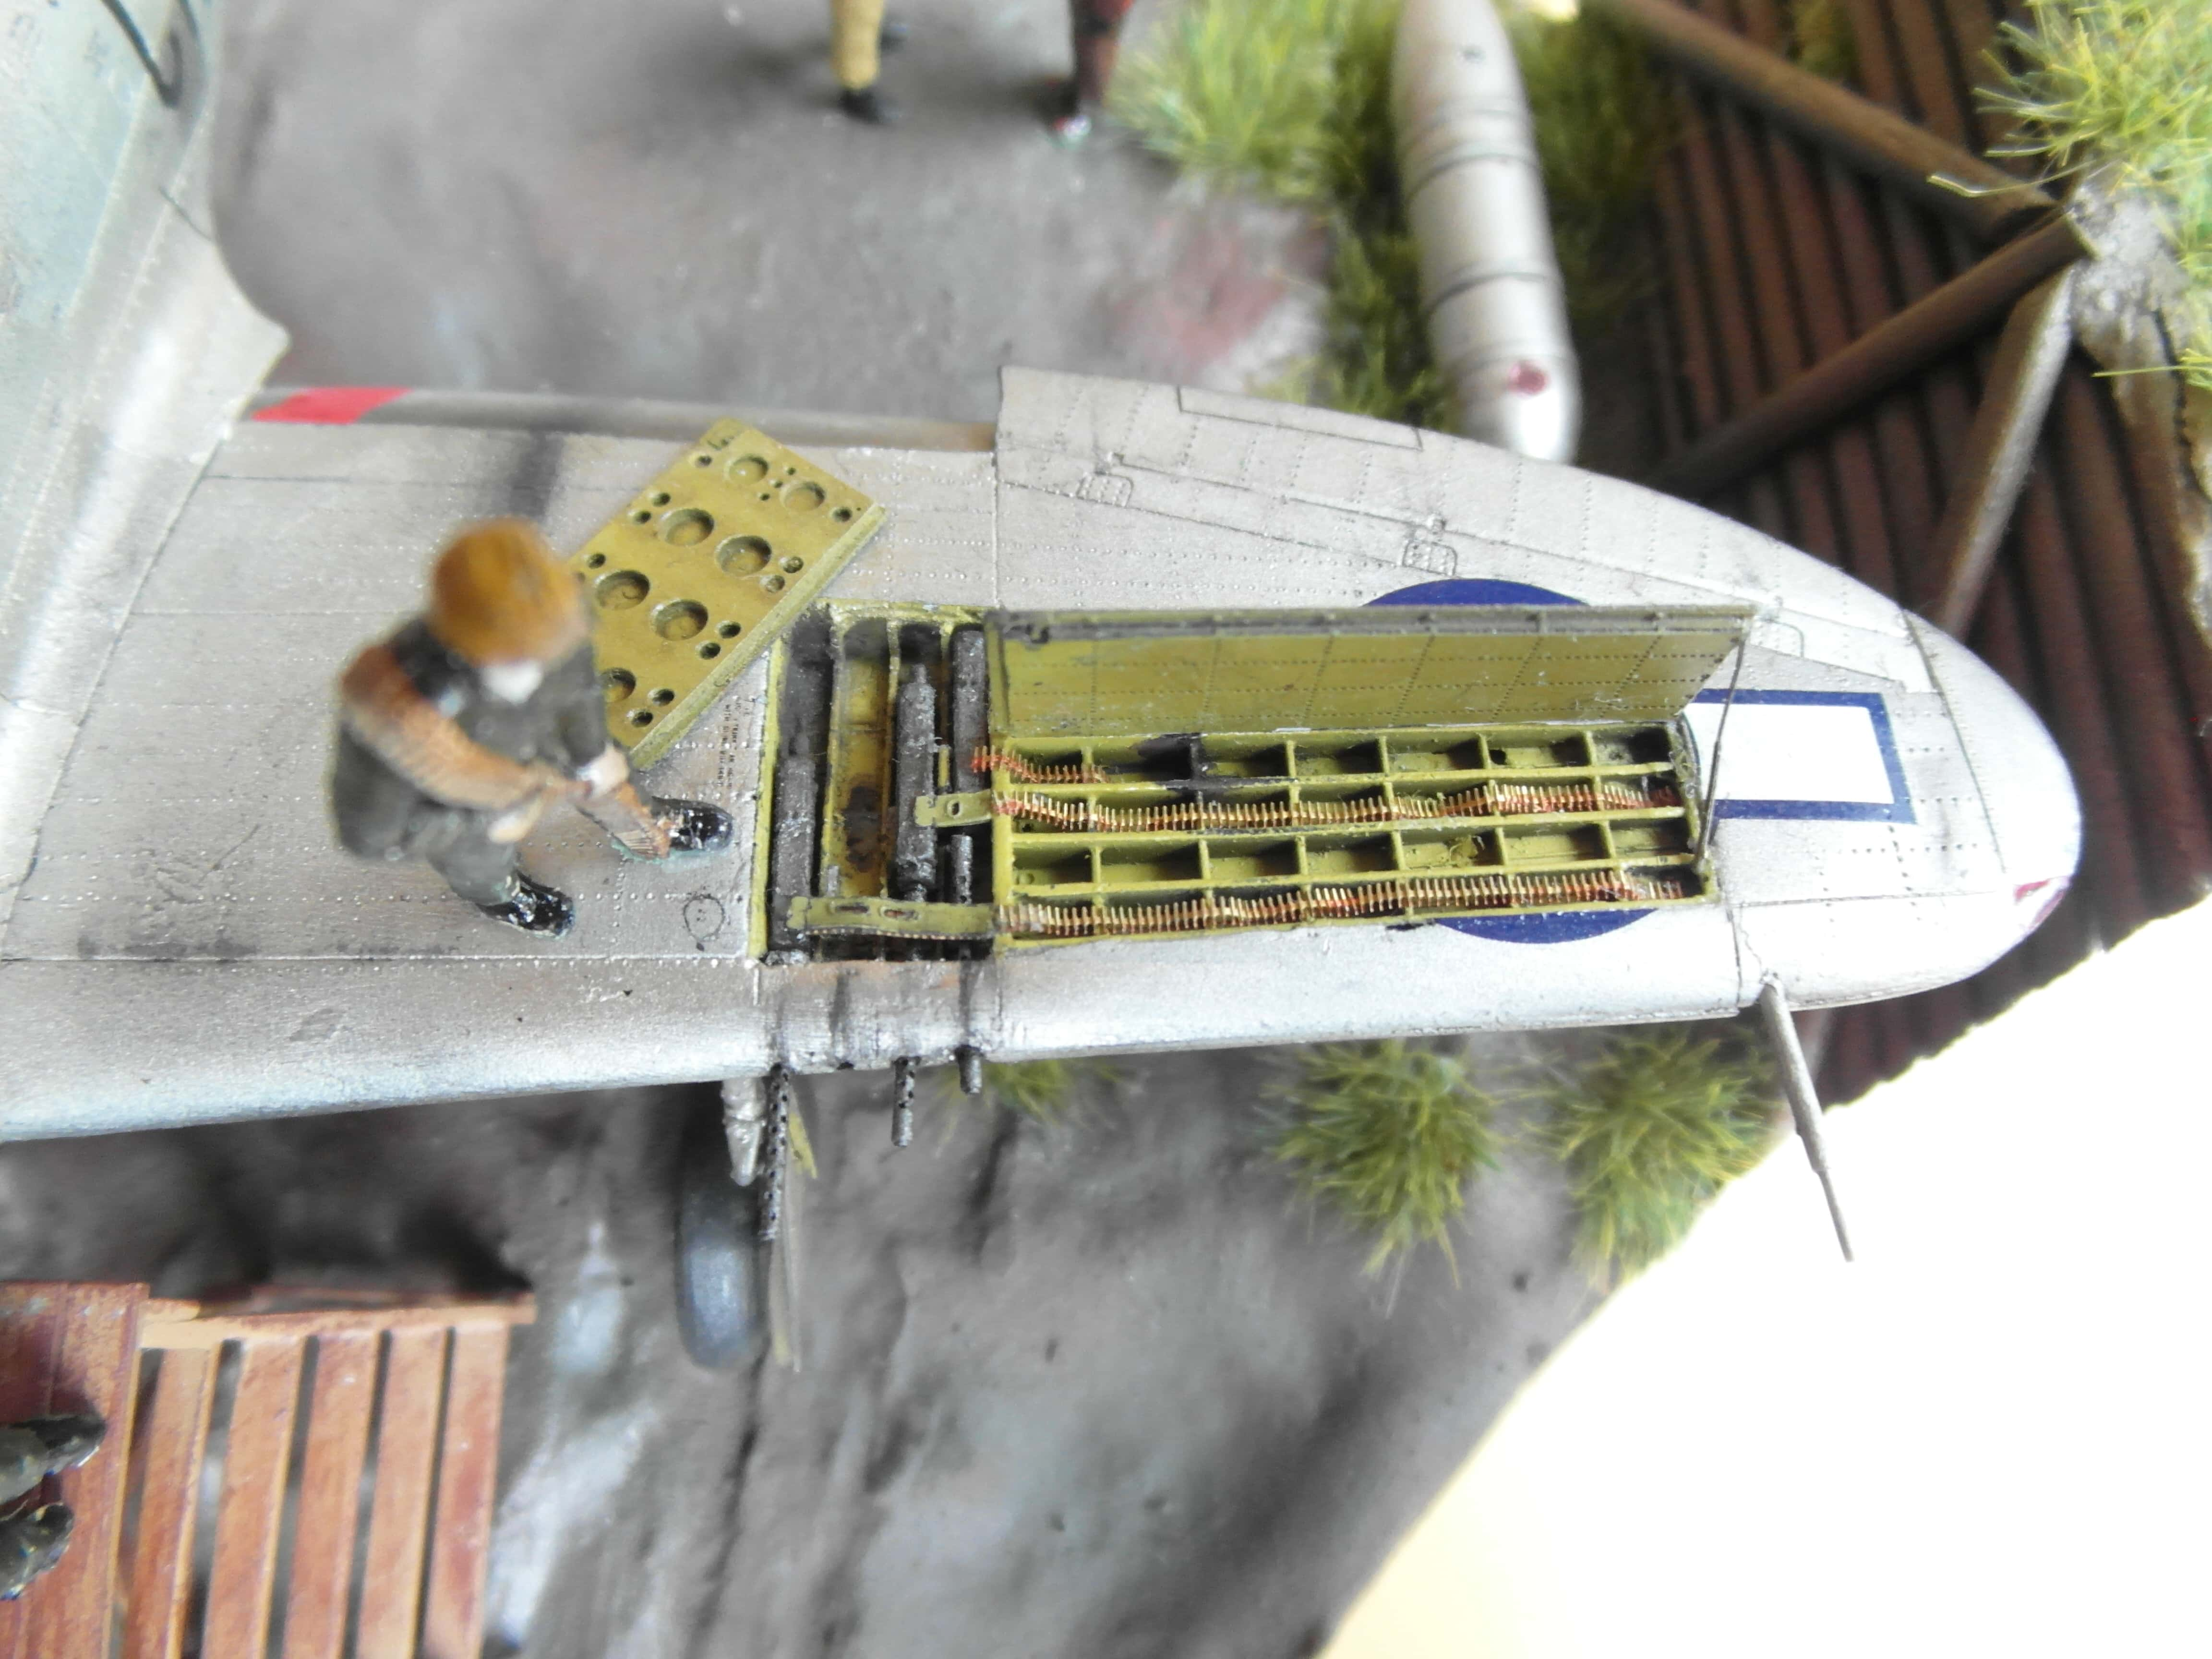
The Republic P-47 Thunderbolt was a World War II era fighter aircraft produced by the United States from 1941 through 1945. Its primary armament was eight .50-caliber machine guns and in the fighter-bomber ground-attack role it could carry five-inch rockets or a bomb load of 2,500 pounds (1,103 kg). When fully loaded, the P-47 weighed up to eight tons, making it one of the heaviest fighters of the war. The P-47 was designed around the powerful Pratt & Whitney R-2800 Double Wasp engine, which was also used by two U.S. Navy/U.S. Marine Corps fighters, the Grumman F6F Hellcat and the Vought F4U Corsair. The Thunderbolt was effective as a short-to medium-range escort fighter in high-altitude air-to-air combat and ground attack in both the European and Pacific theaters.
The P-47 was one of the main United States Army Air Forces (USAAF) fighters of World War II, and also served with other Allied air forces, including those of France, the United Kingdom, and the Soviet Union. Mexican and Brazilian squadrons fighting alongside the USAAF also flew the P-47.
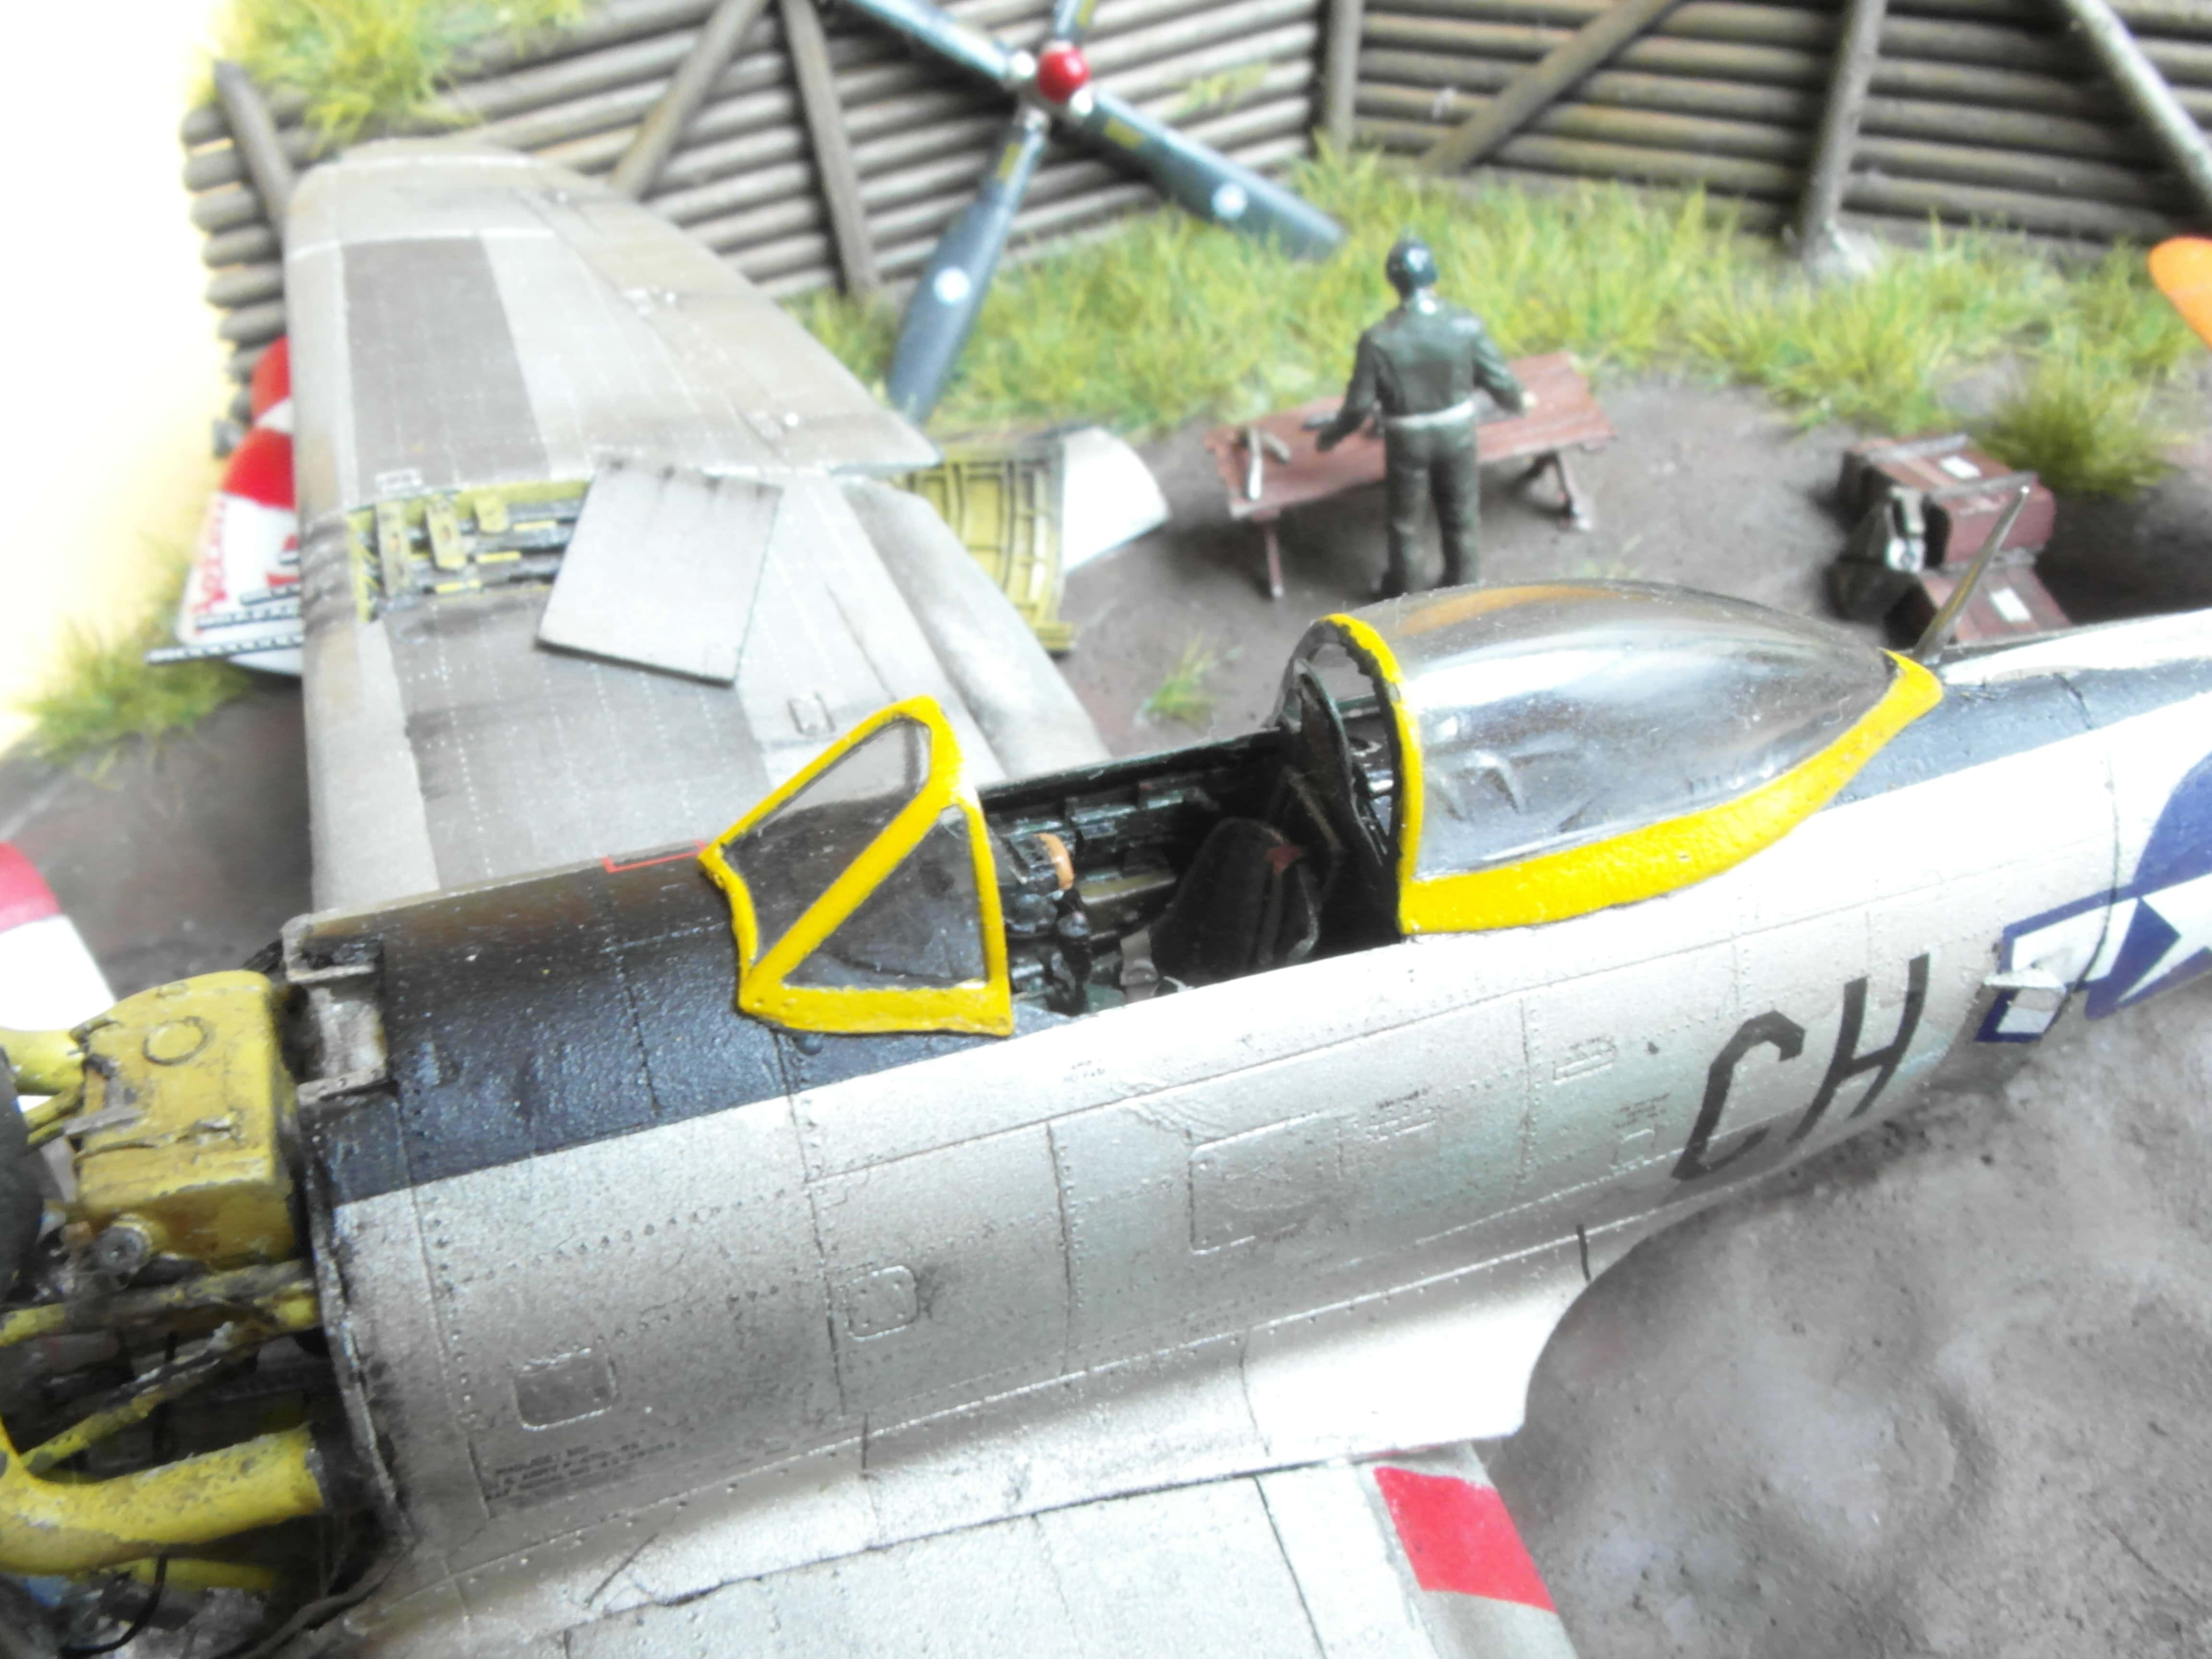
The armored cockpit was relatively roomy and comfortable, and the bubble canopy introduced on the P-47D offered good visibility. A present-day U.S. ground-attack aircraft, the Fairchild Republic A-10 Thunderbolt II, takes its name from the P-47.

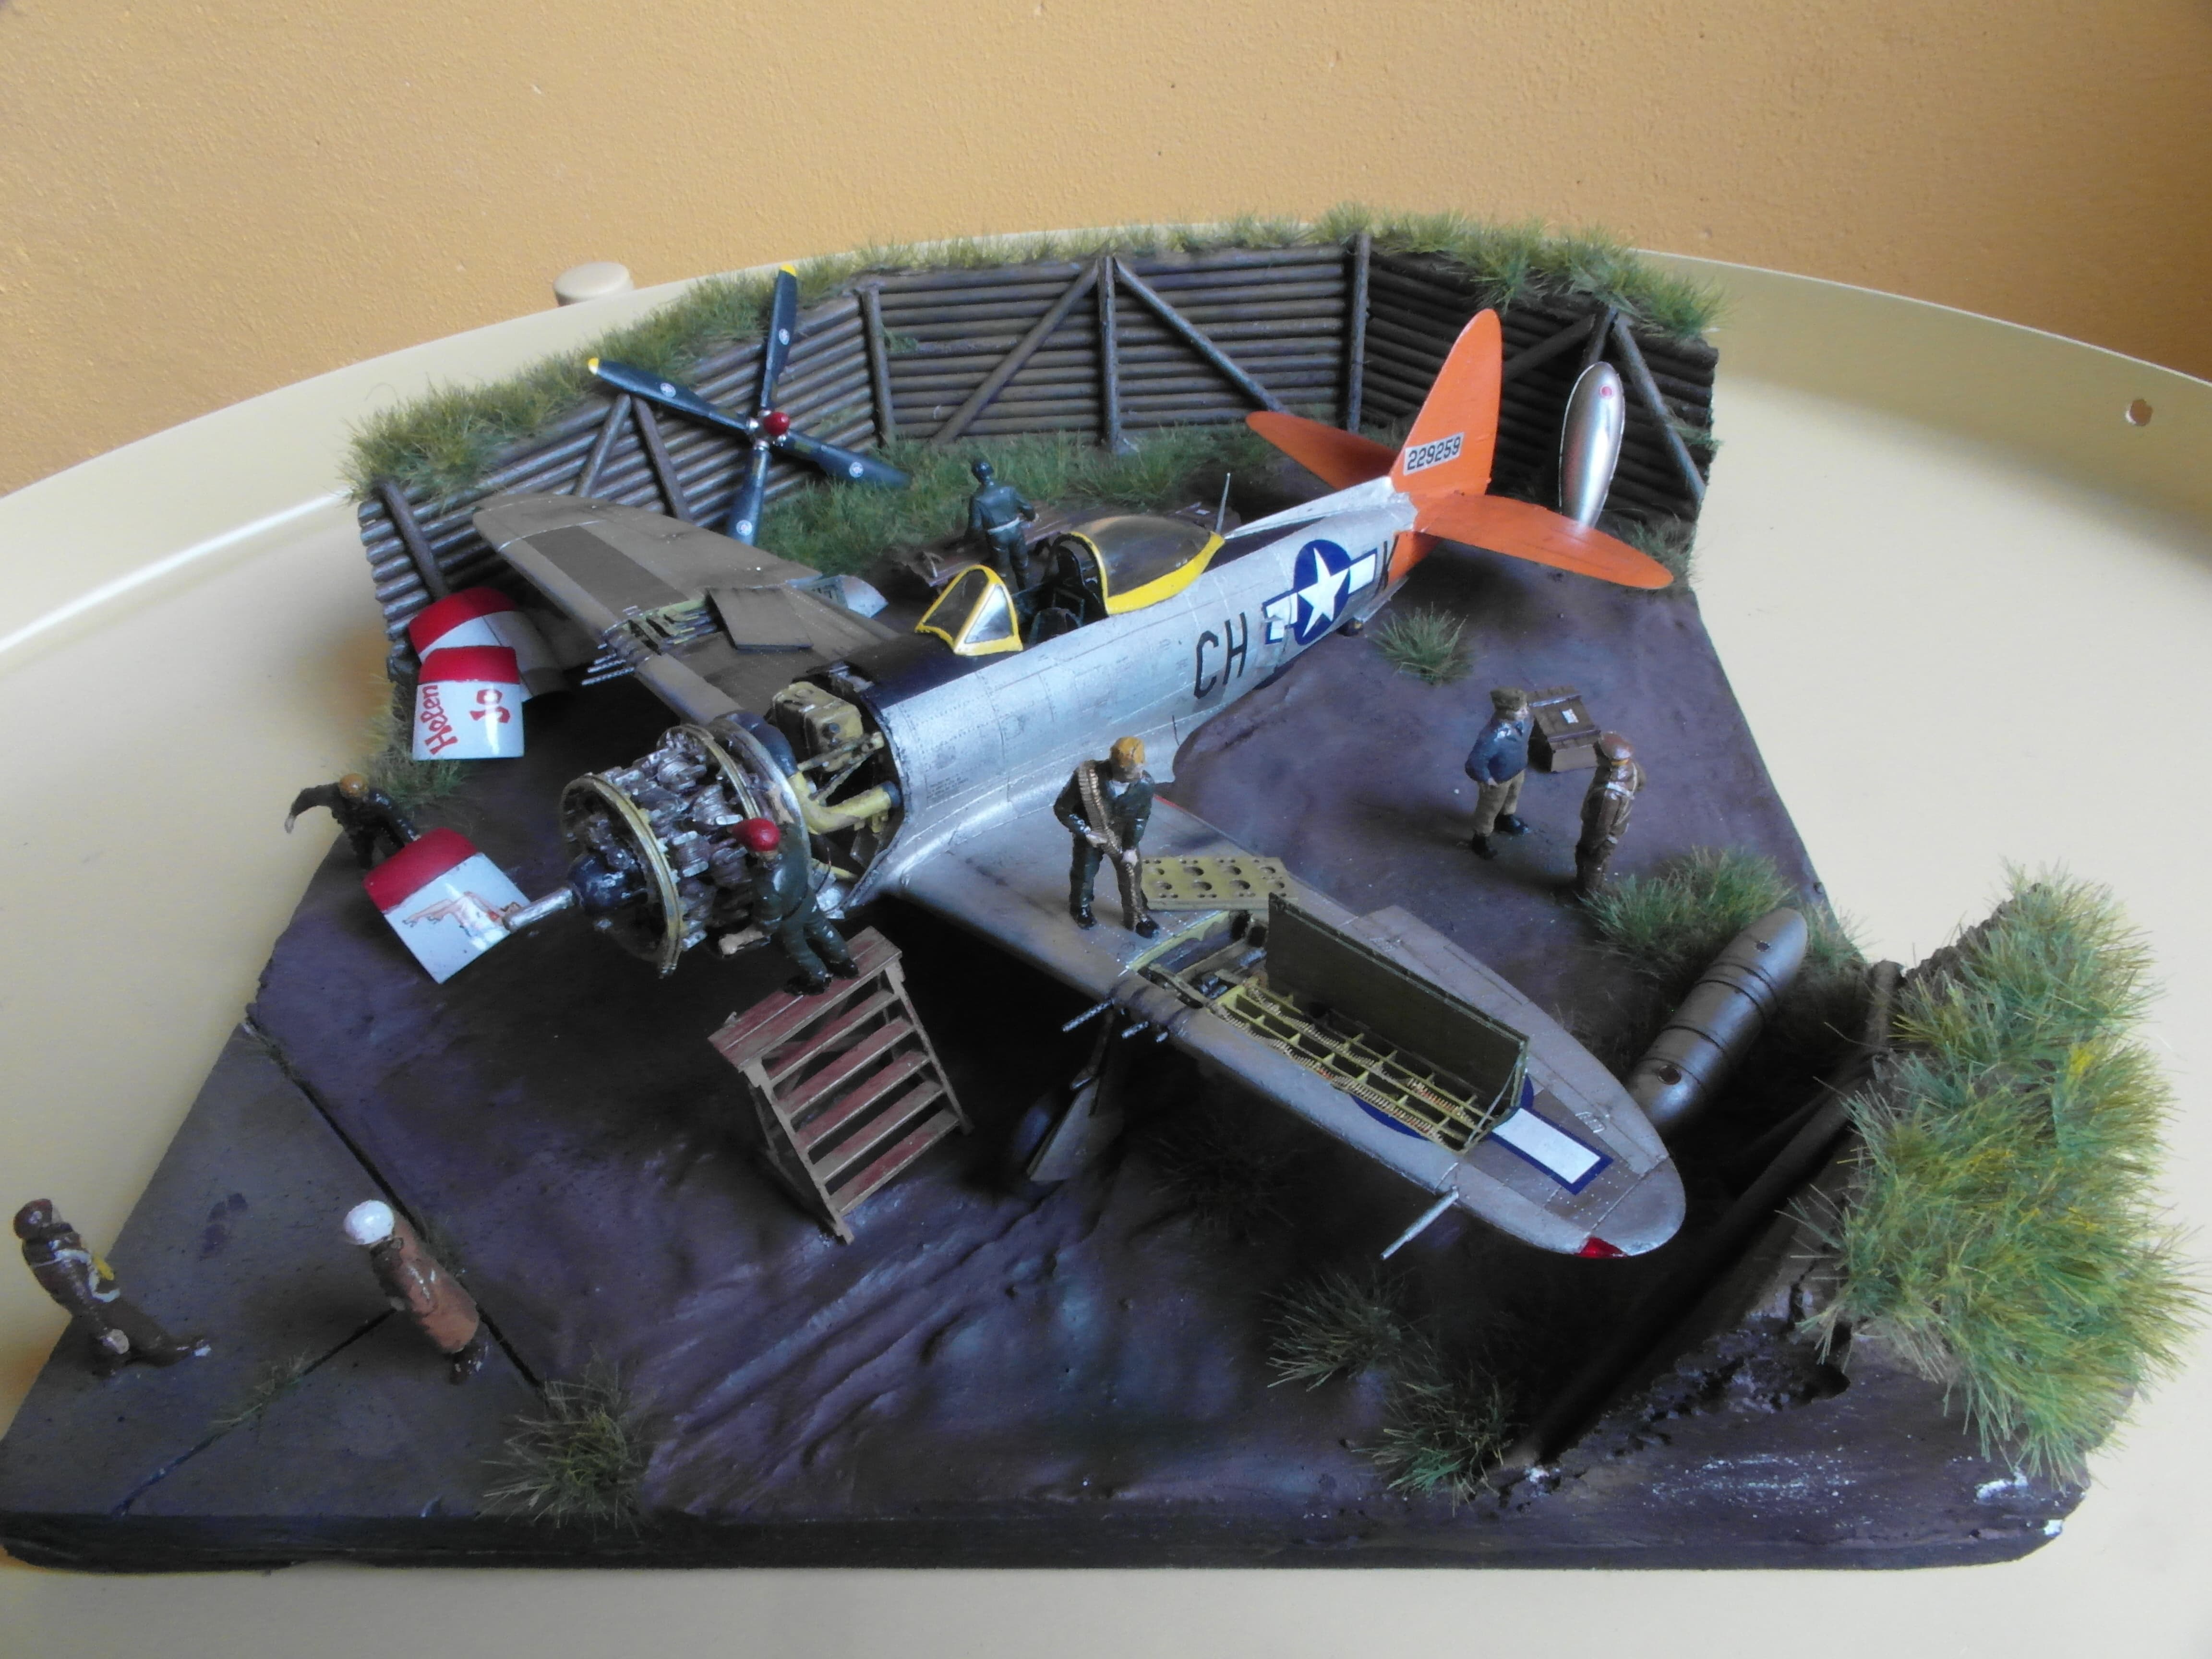
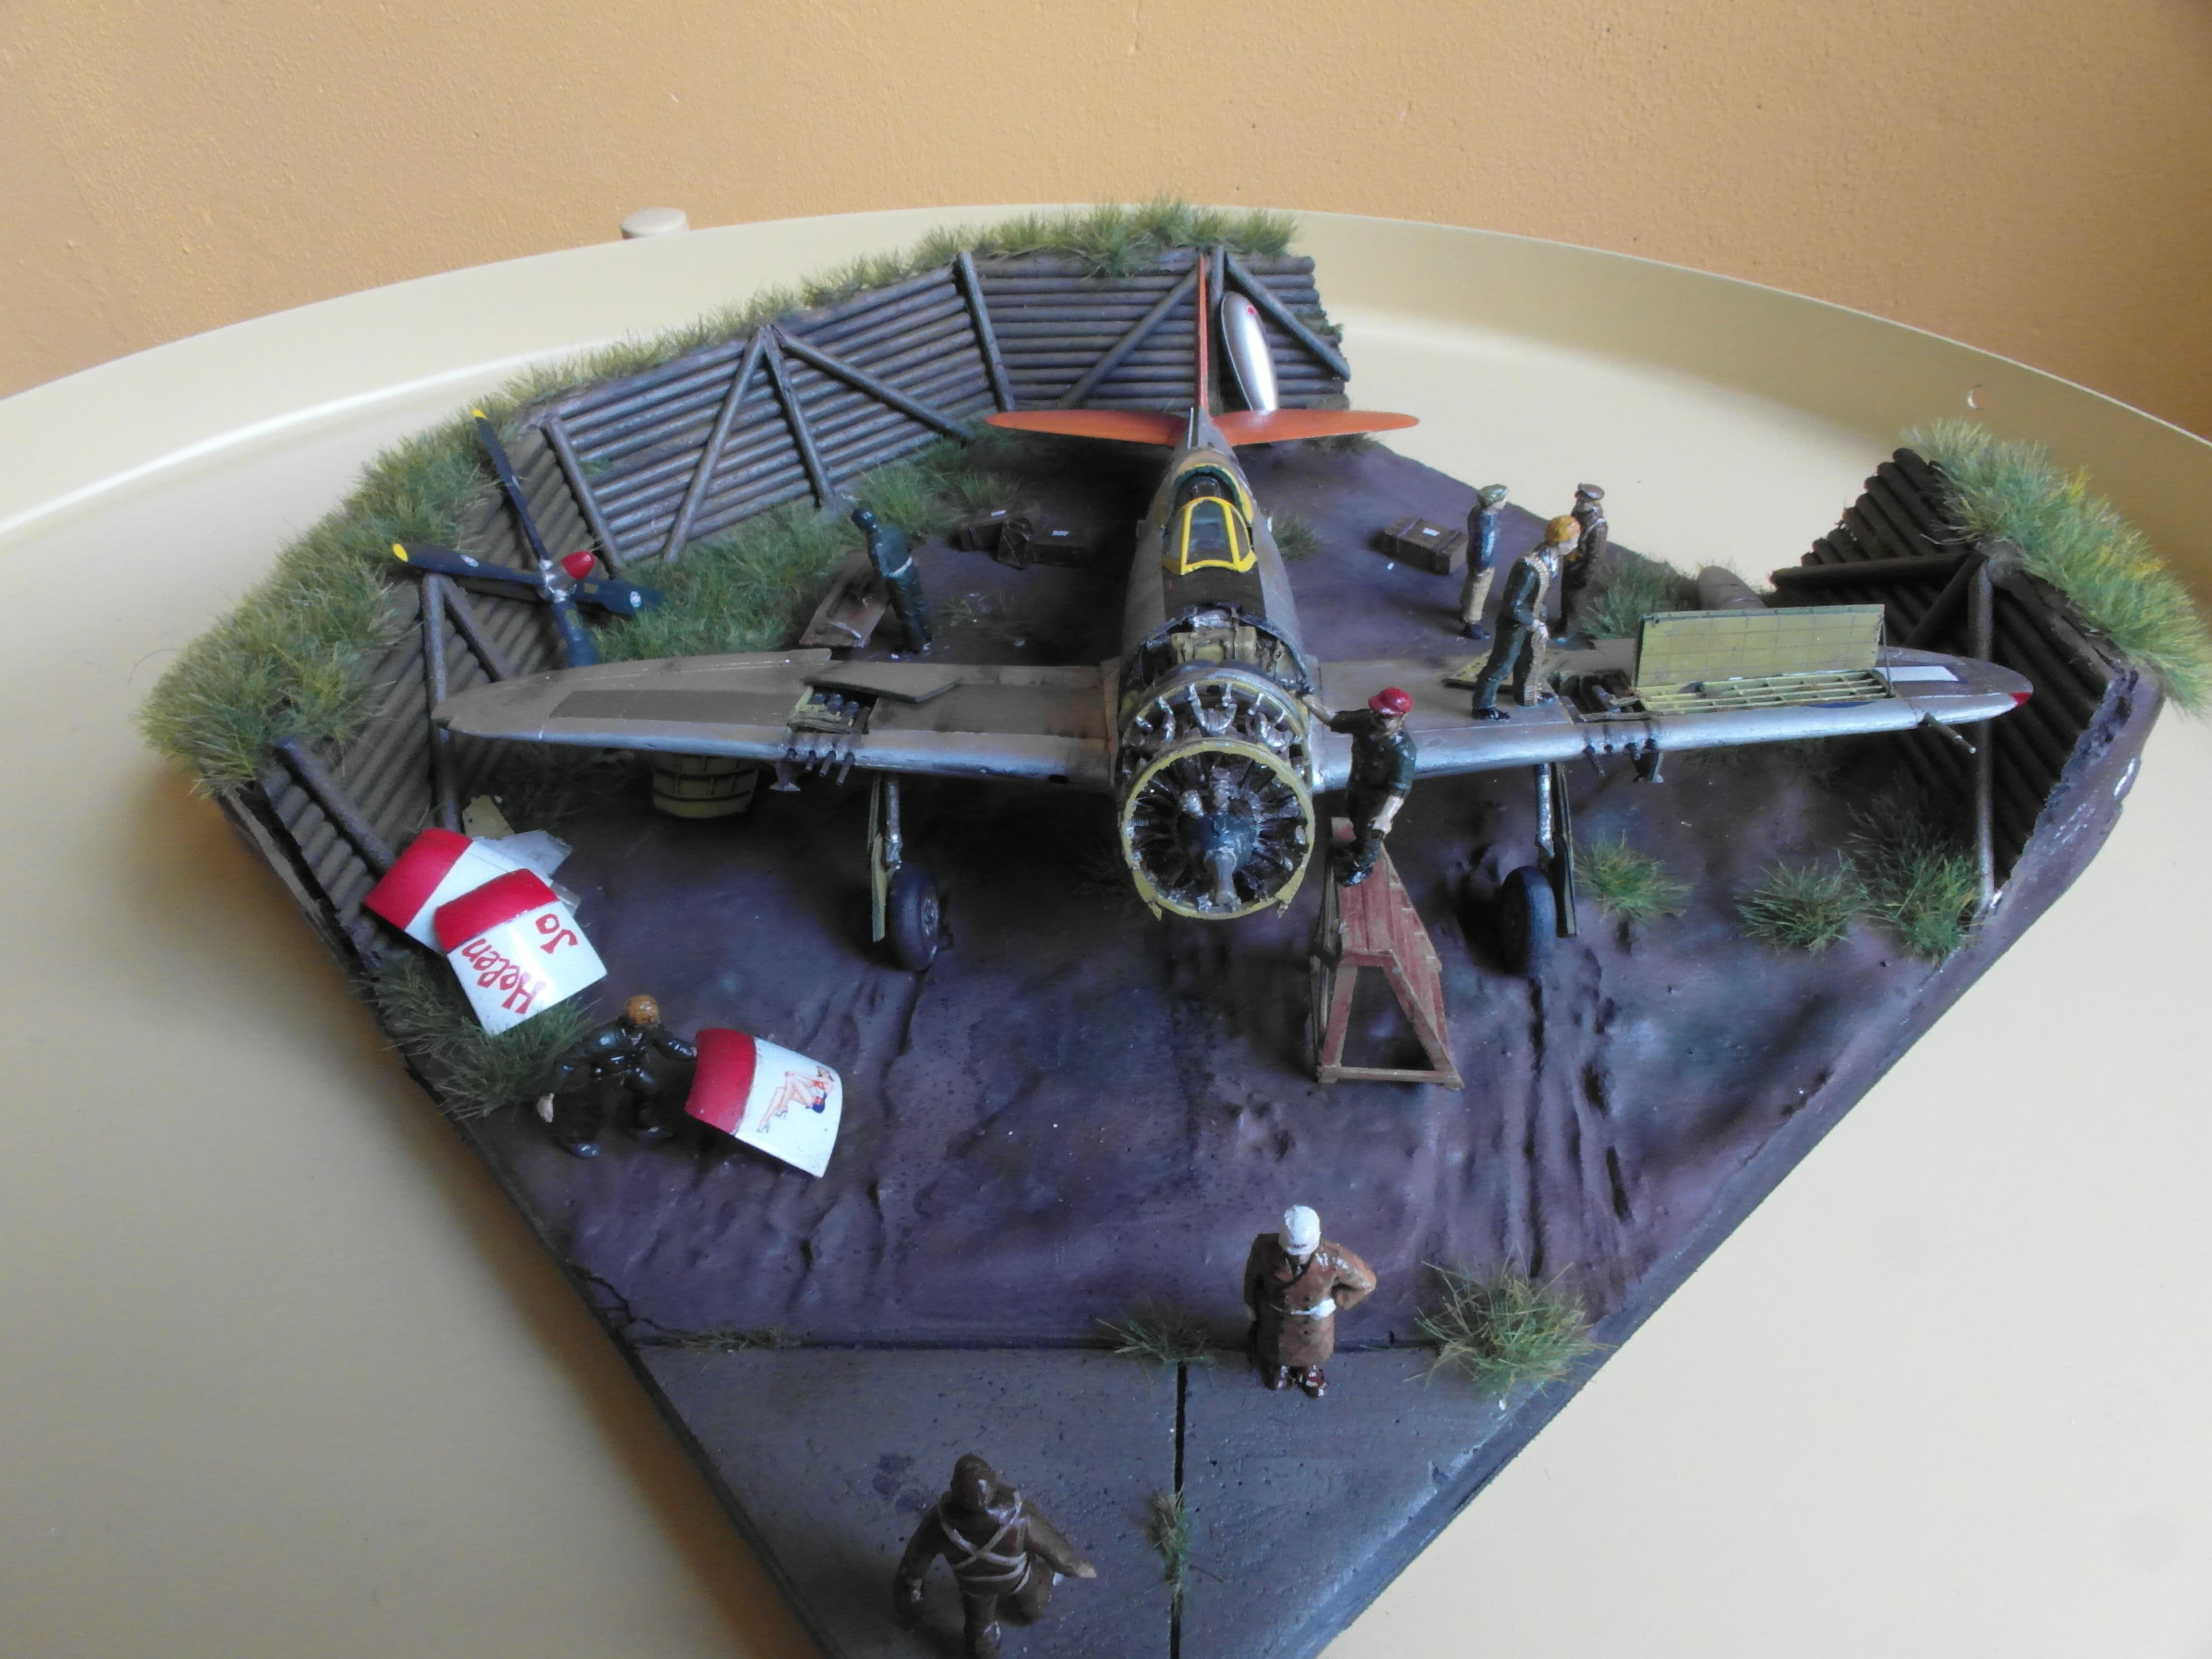
A while ago i got my hands on a Messerschmitt Me 323, and one of the first thoughts I had with that plane was that it would be very suitable for a diorama. However with such things it might be wise to try such an endeavor with a smaller kit first. So when I saw the Aires P-47 upgrade kit a while later, I imagined that it would make for a very nice first diorama, with the open engine.
Of course it ain’t all sunshine. The Aires kit was originally meant for the academy kit, but I’ve build the Revell kit before, and it has a lot nicer surface details. Without too much thinking I bought the cheaper kit, hoping I could make it work. The cockpit was no issue, But the engine was wider then the kit, so no amount of sanding would be able to make it fit. The gun bays also didn’t line up properly, so after a lot of trying I caved in and bought the Academy kit. To save some of the details, I actually sawed both kits in halve and glued the Revell tail on the plane.
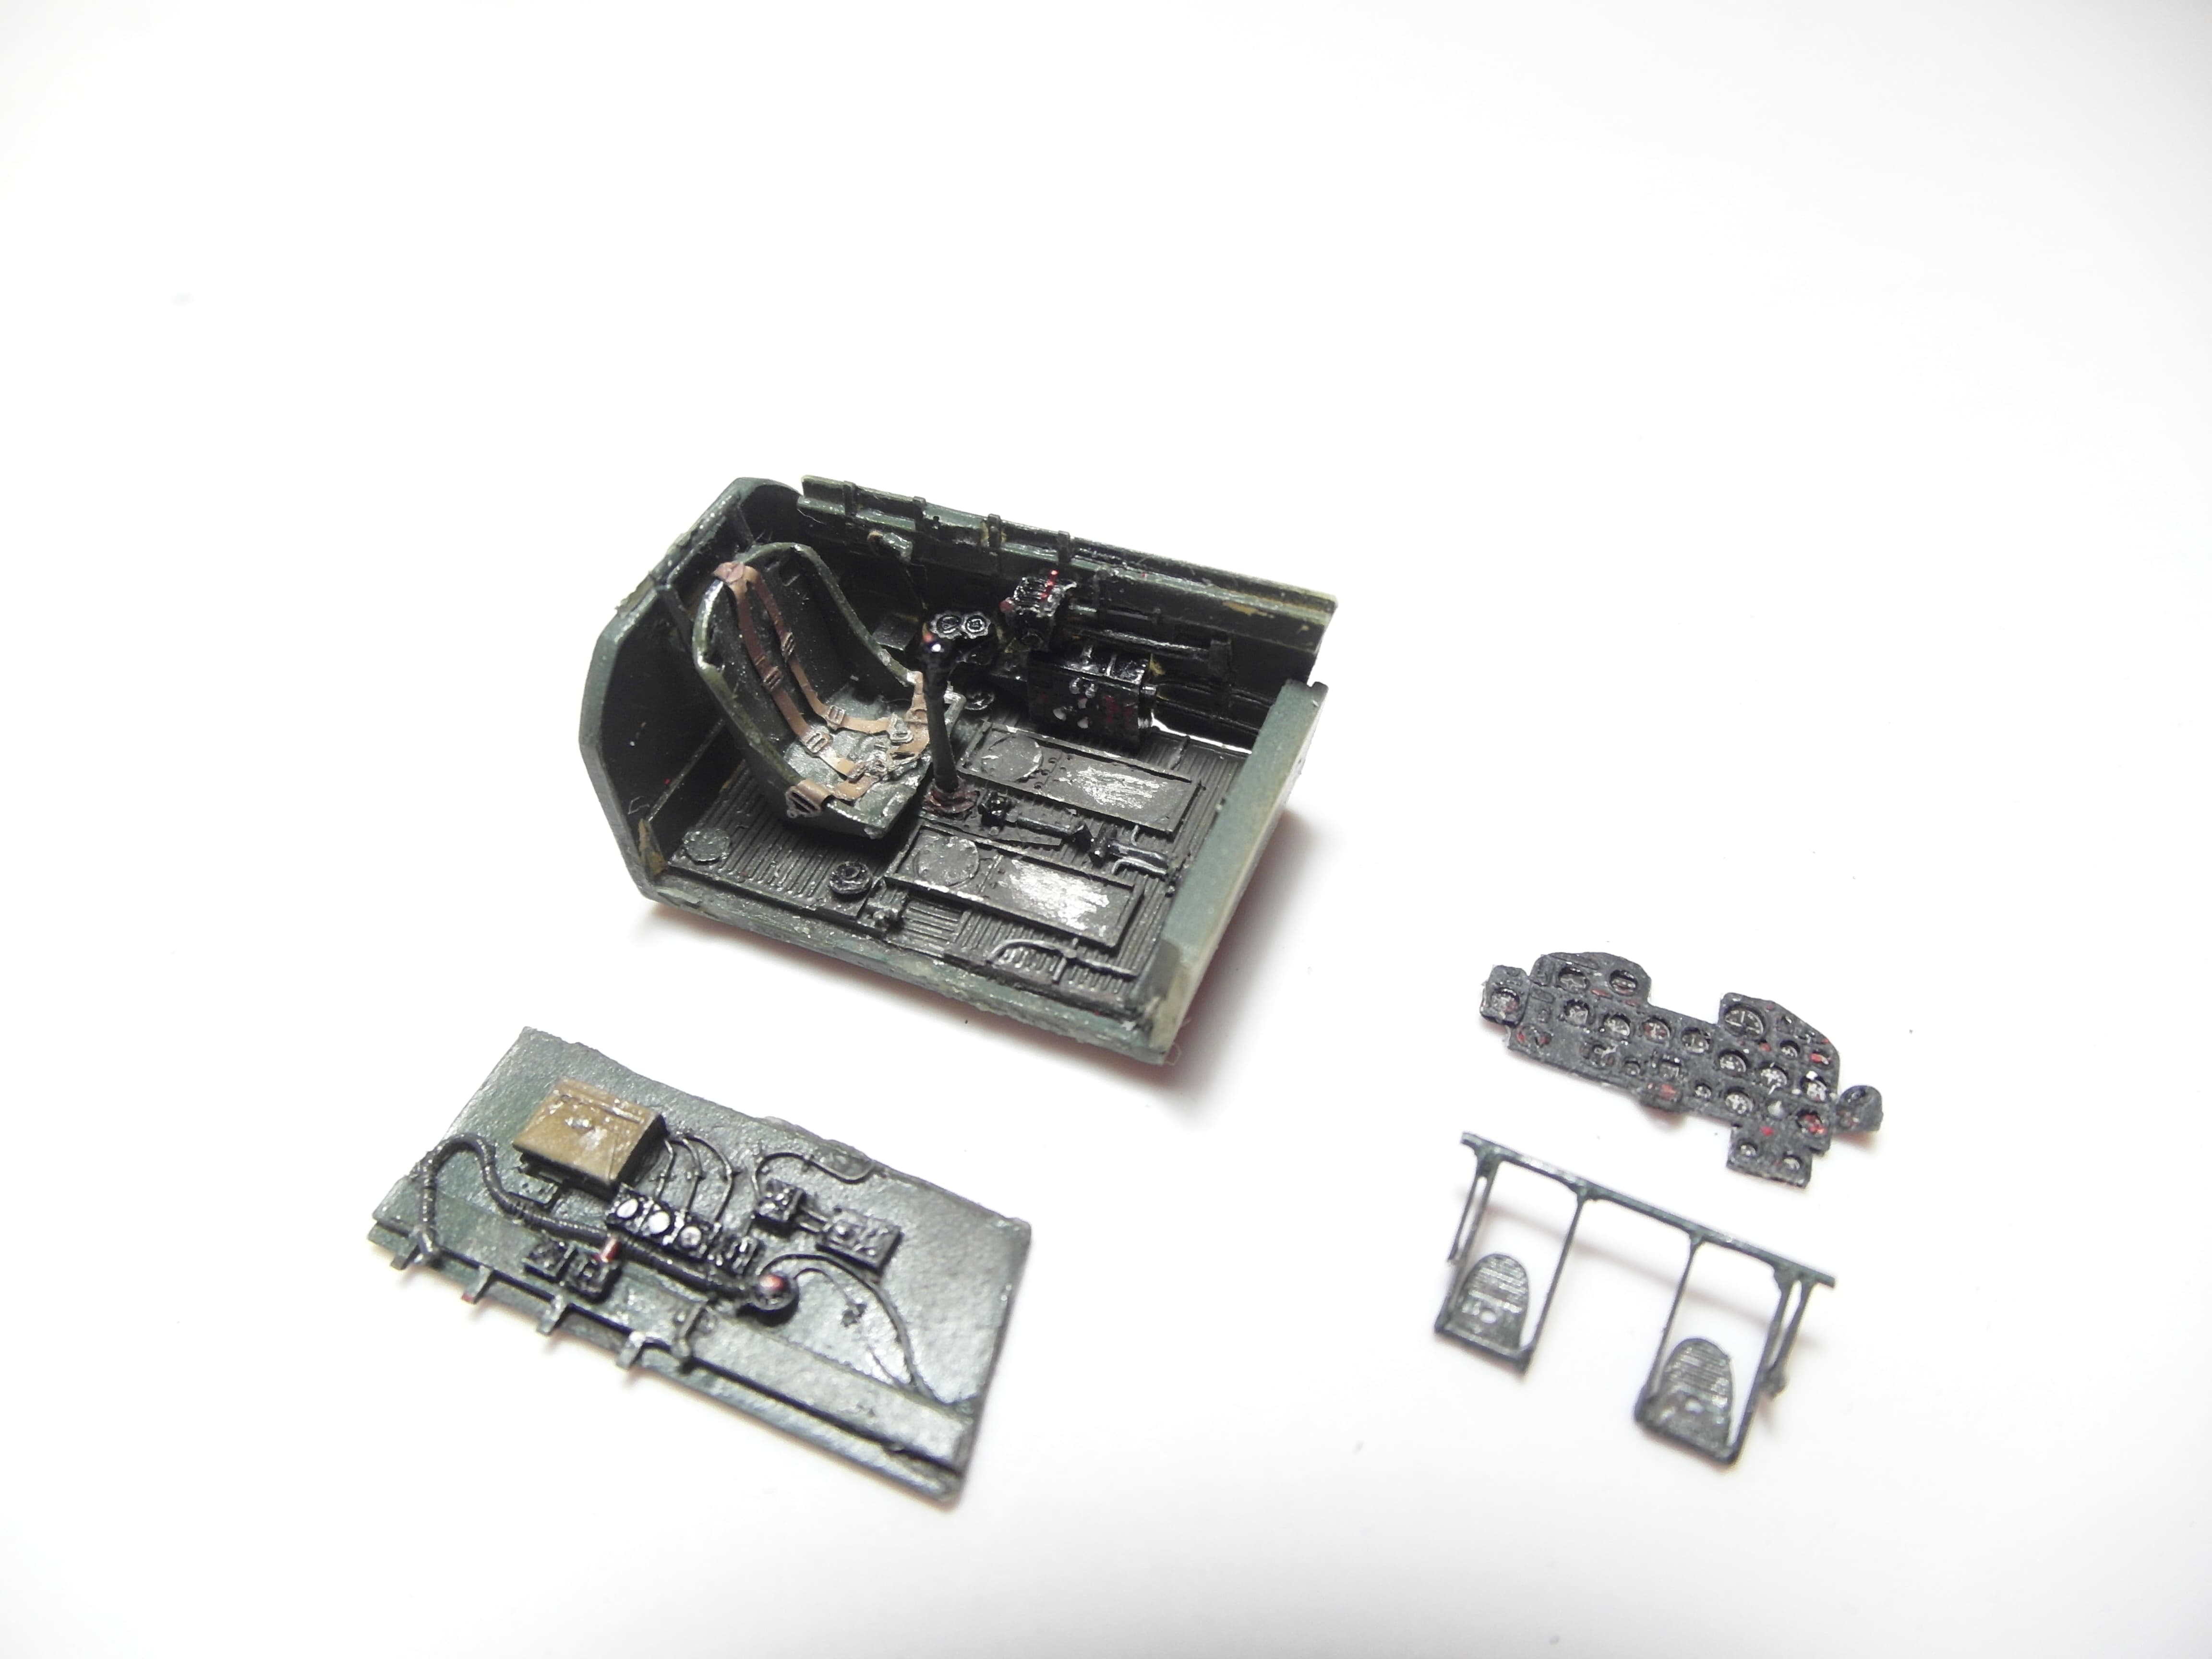
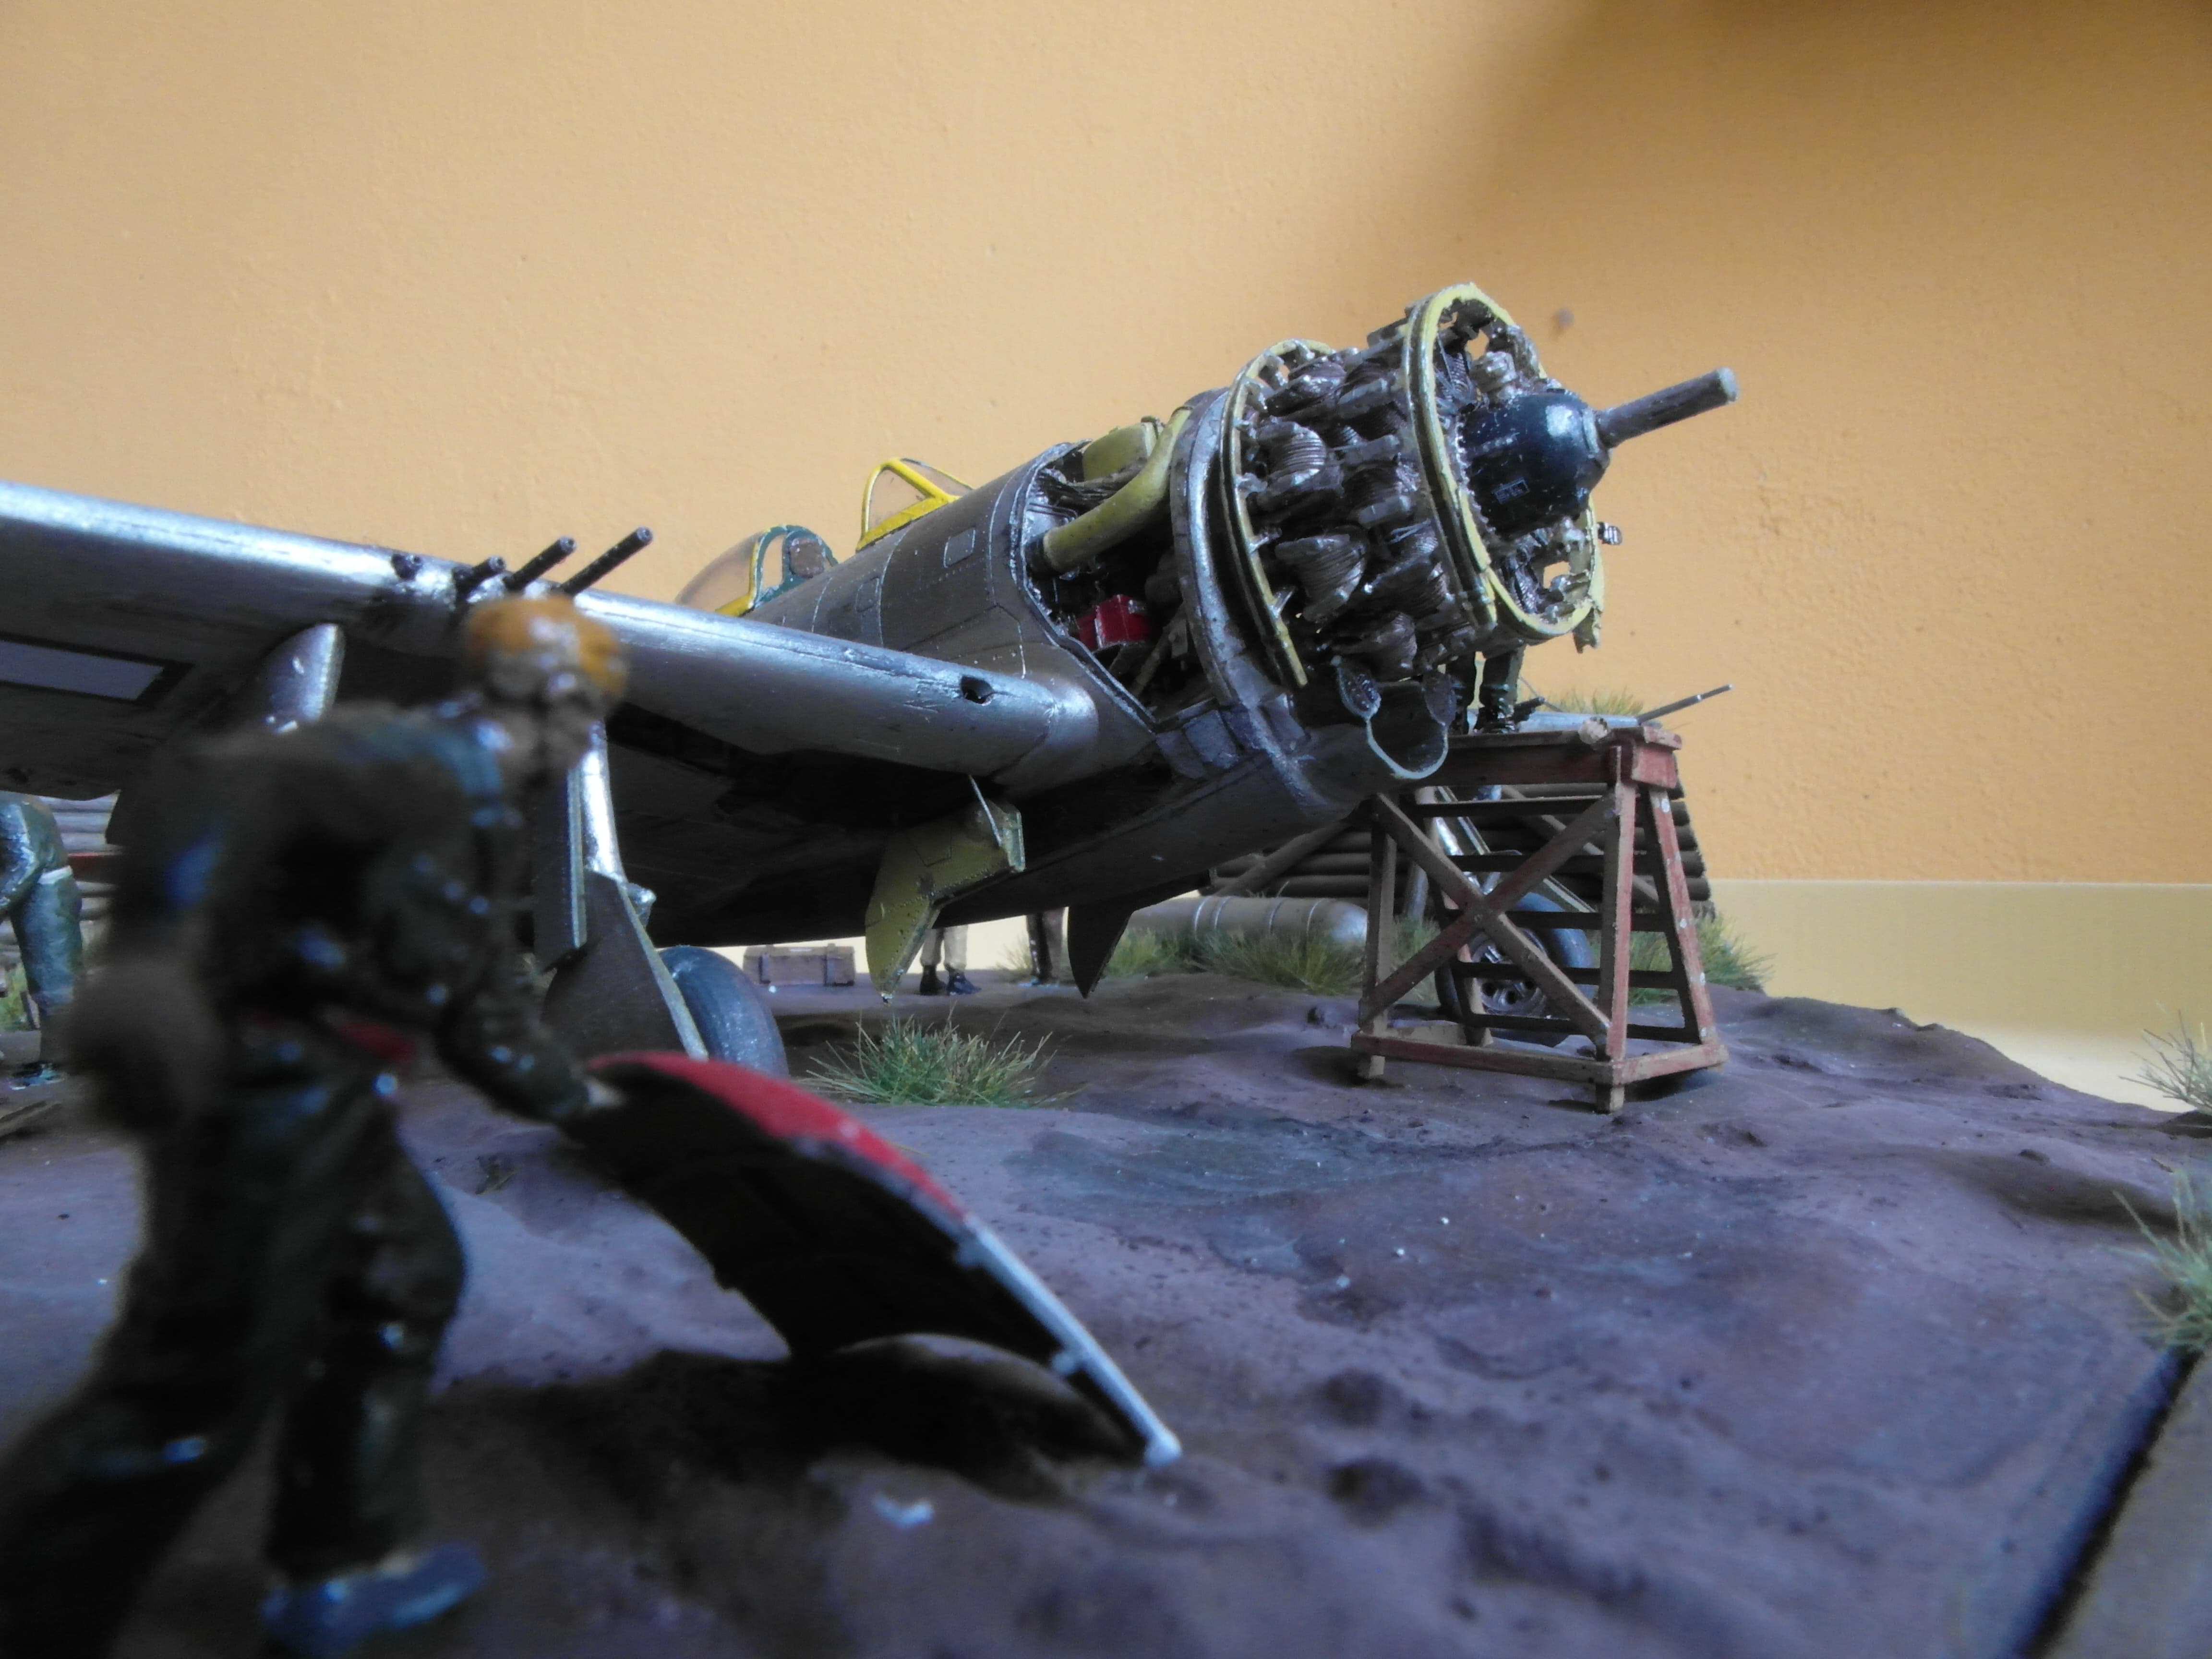
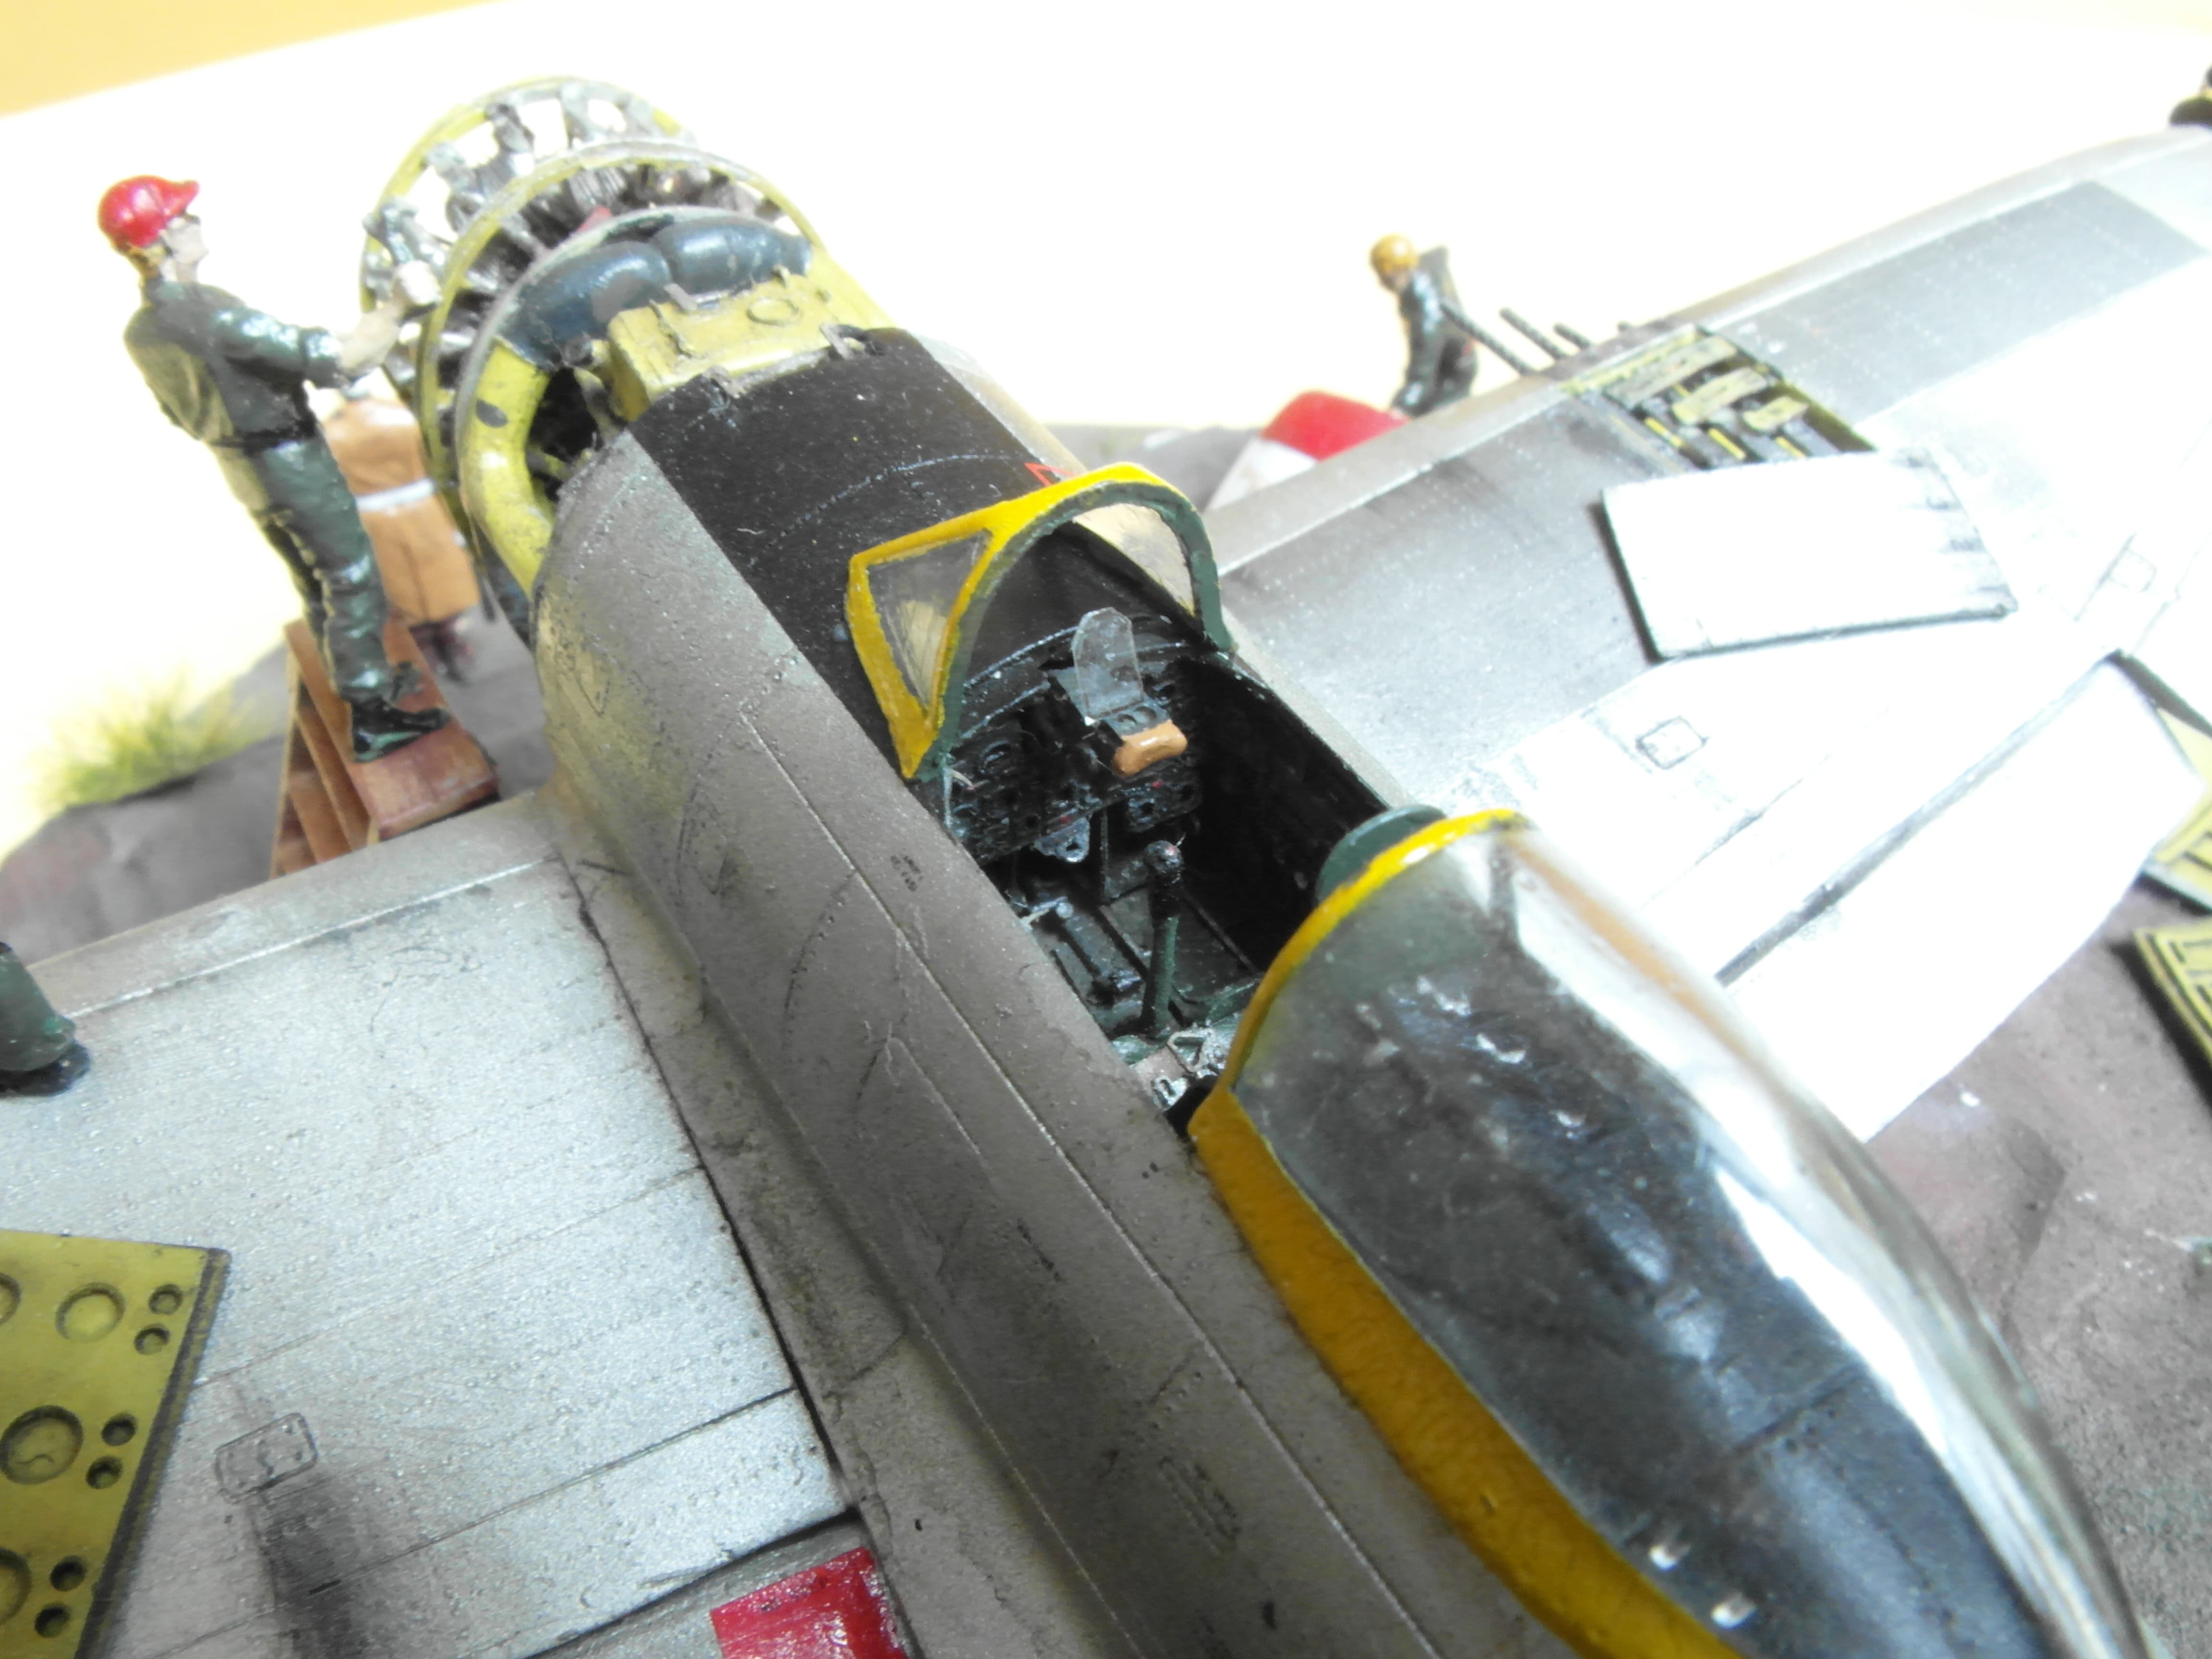
The engine
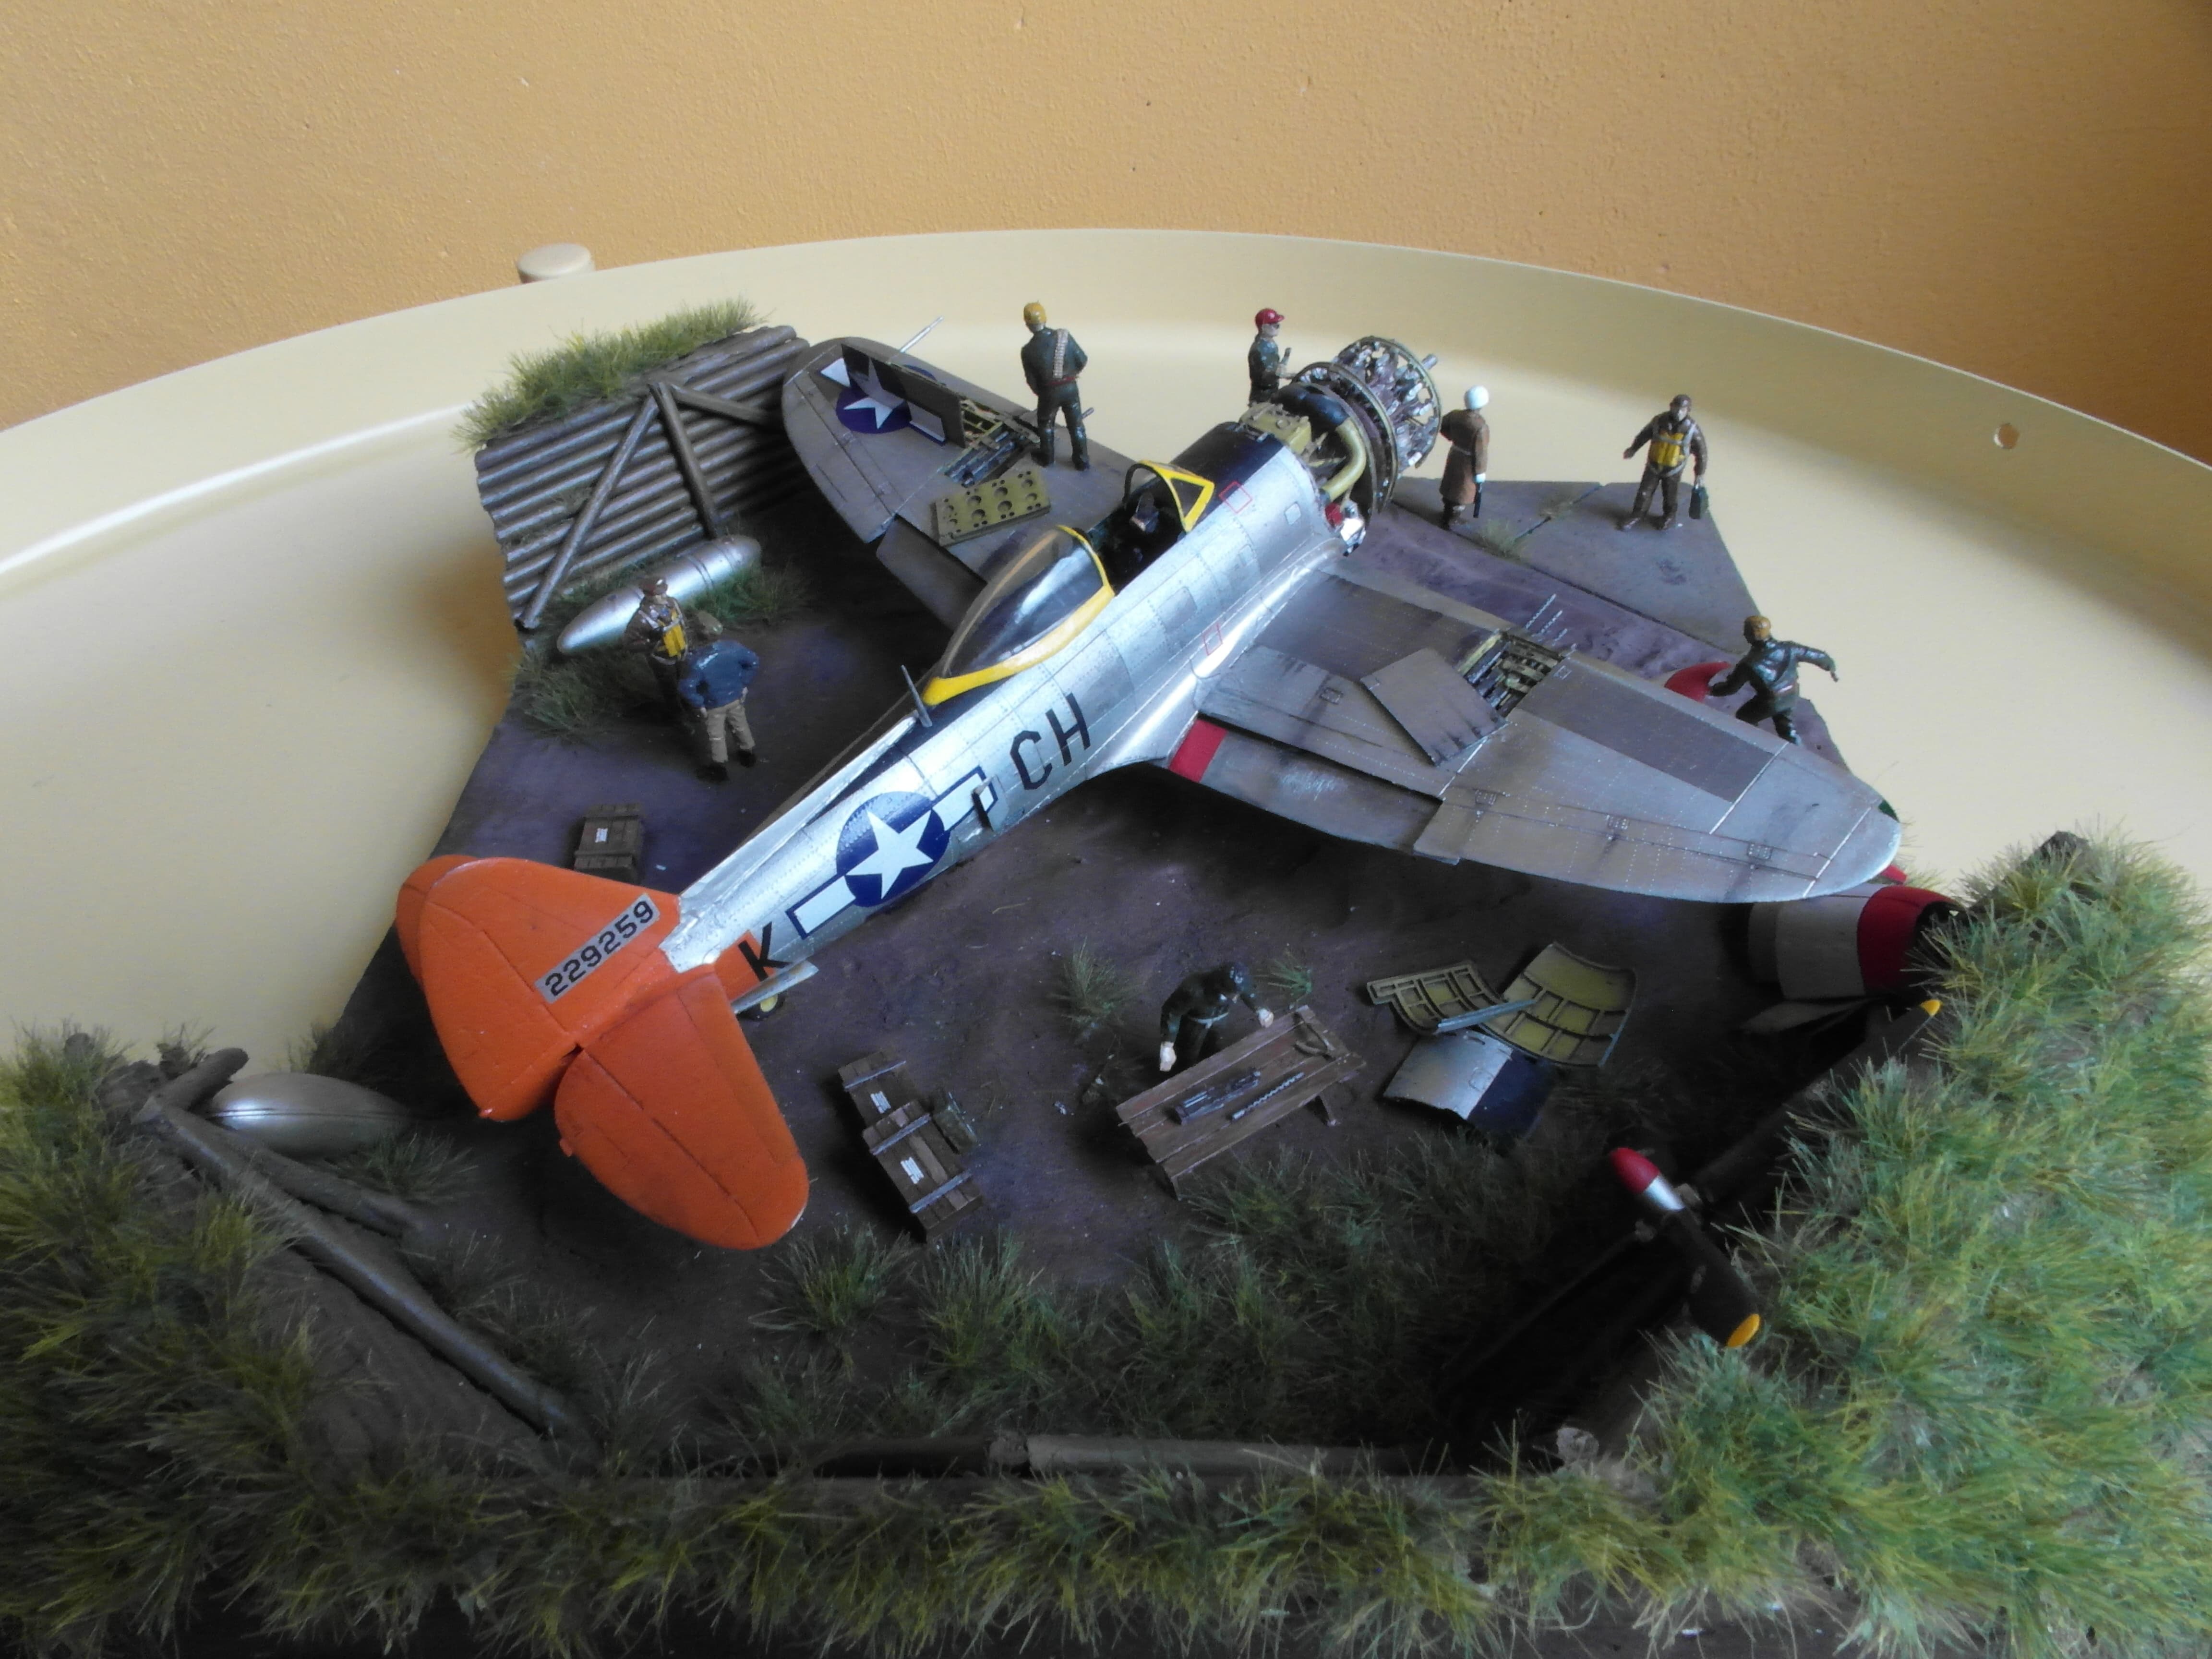
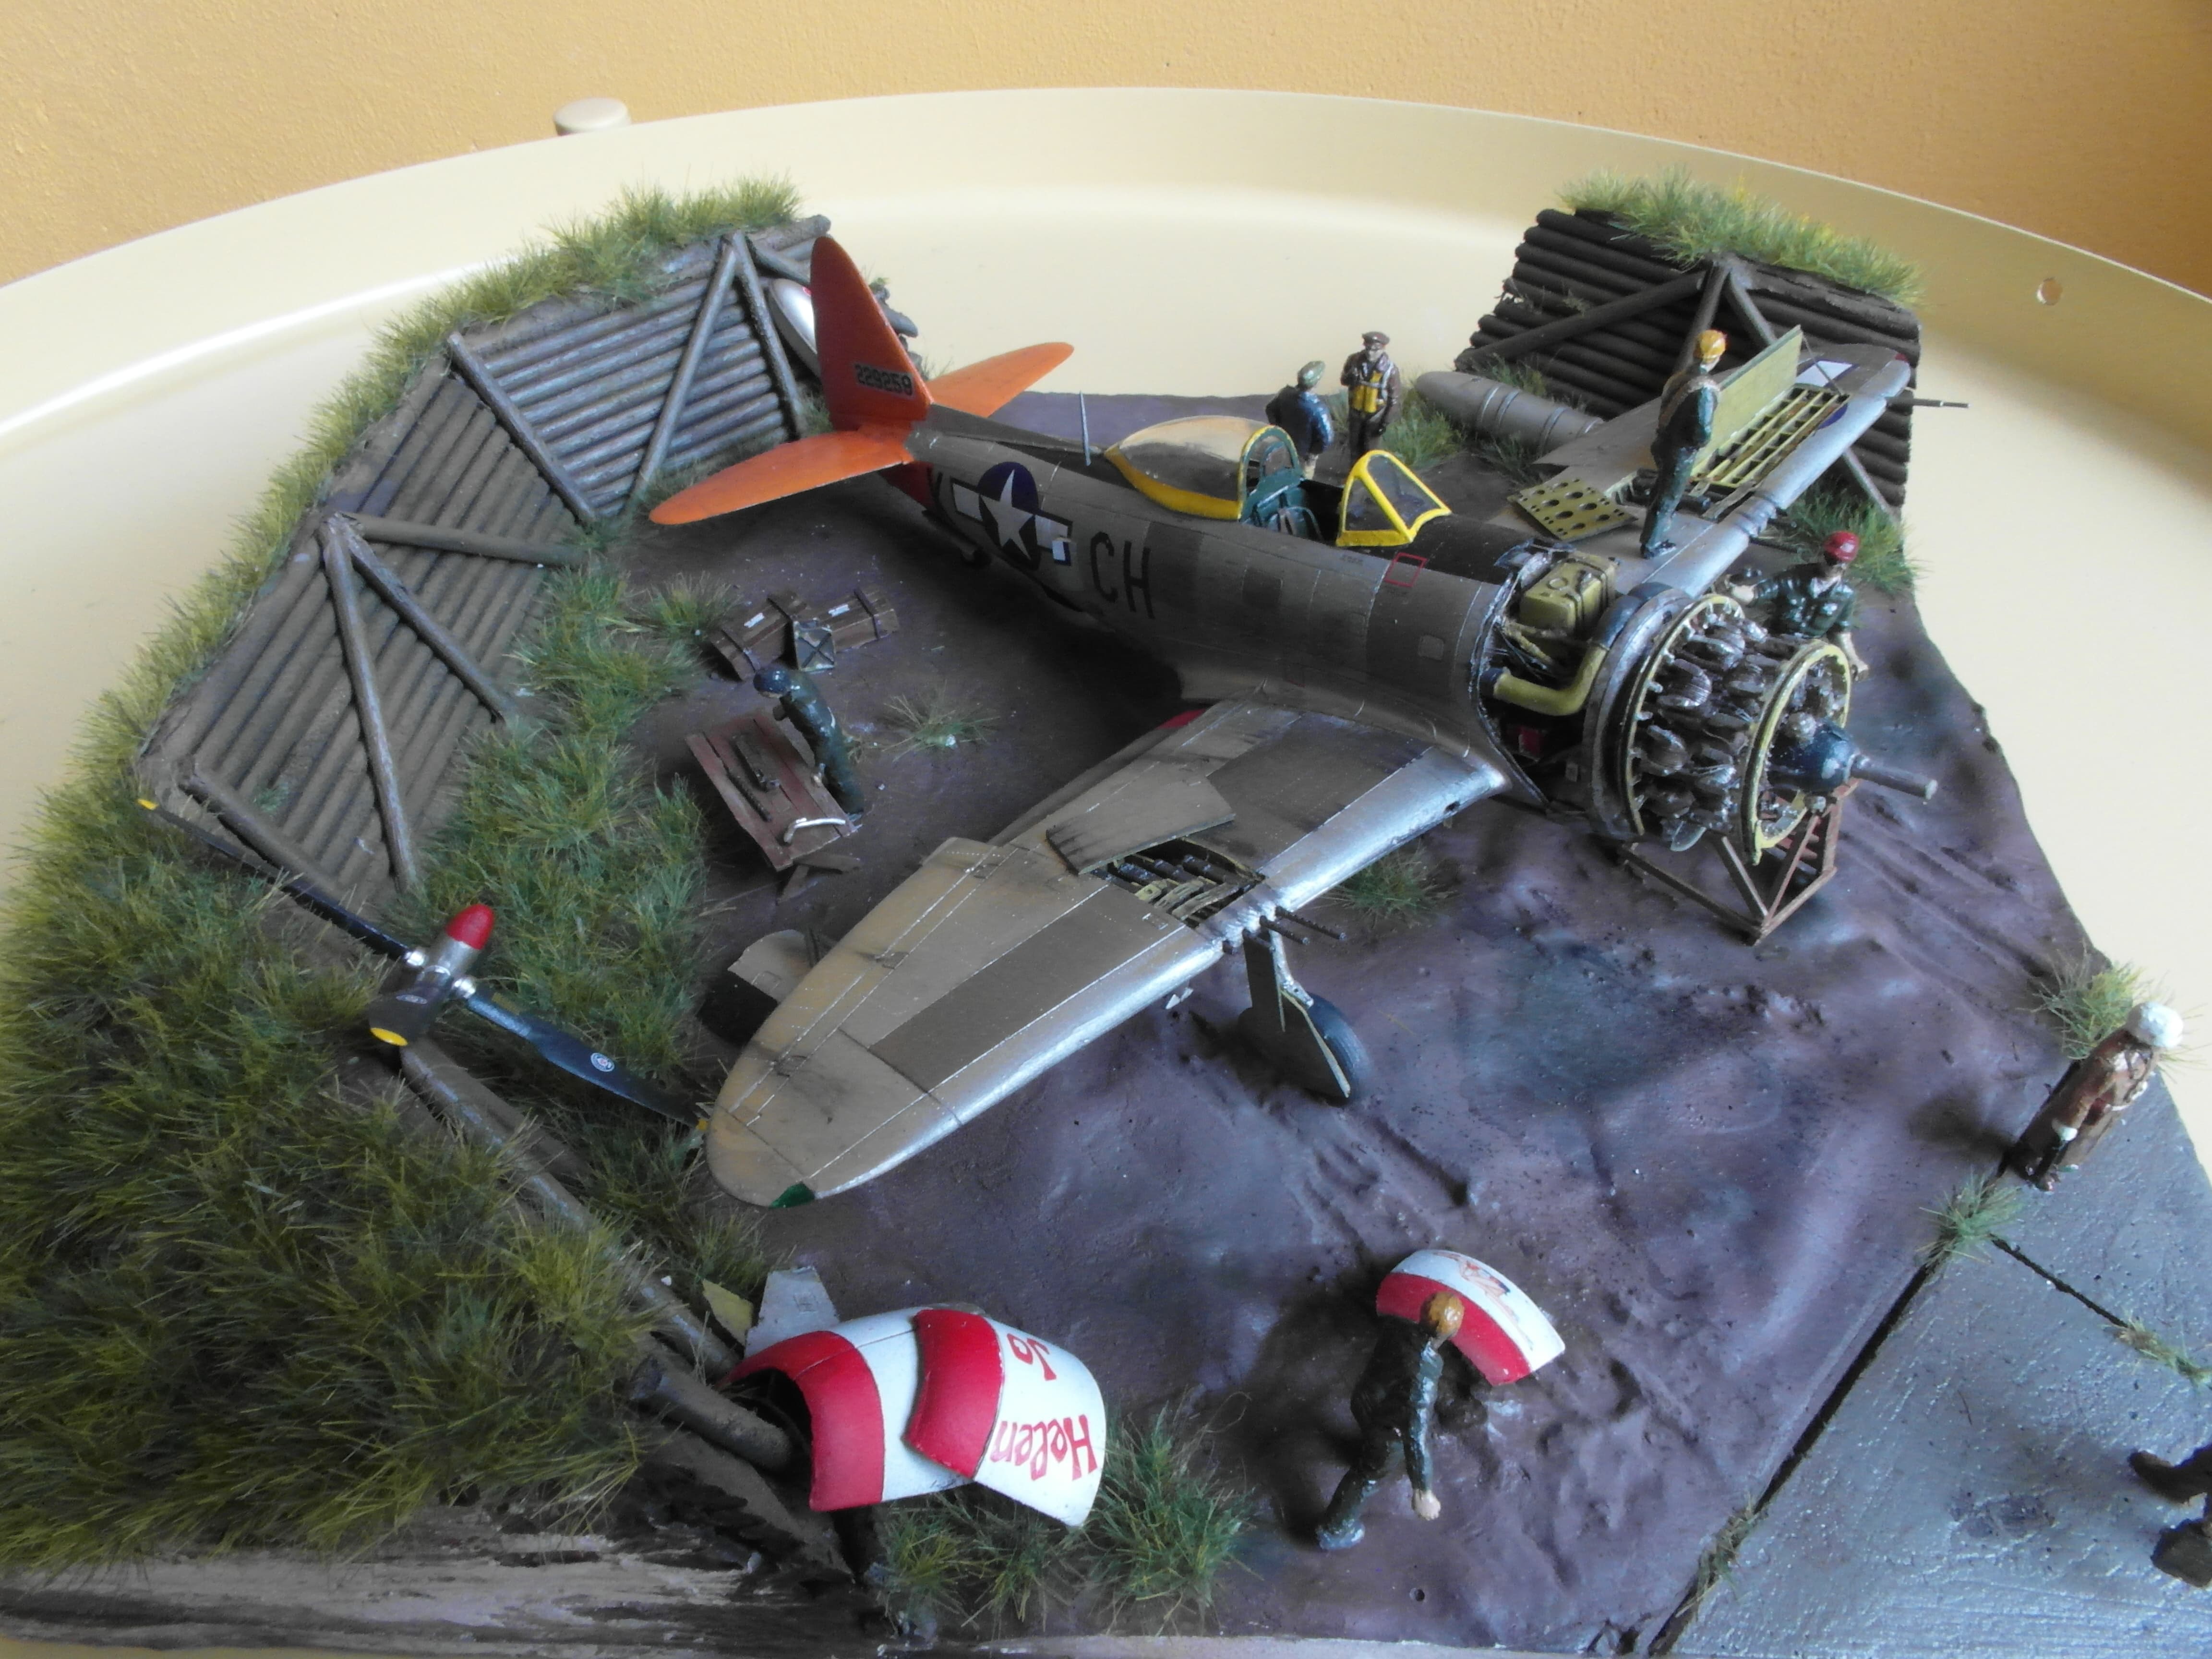
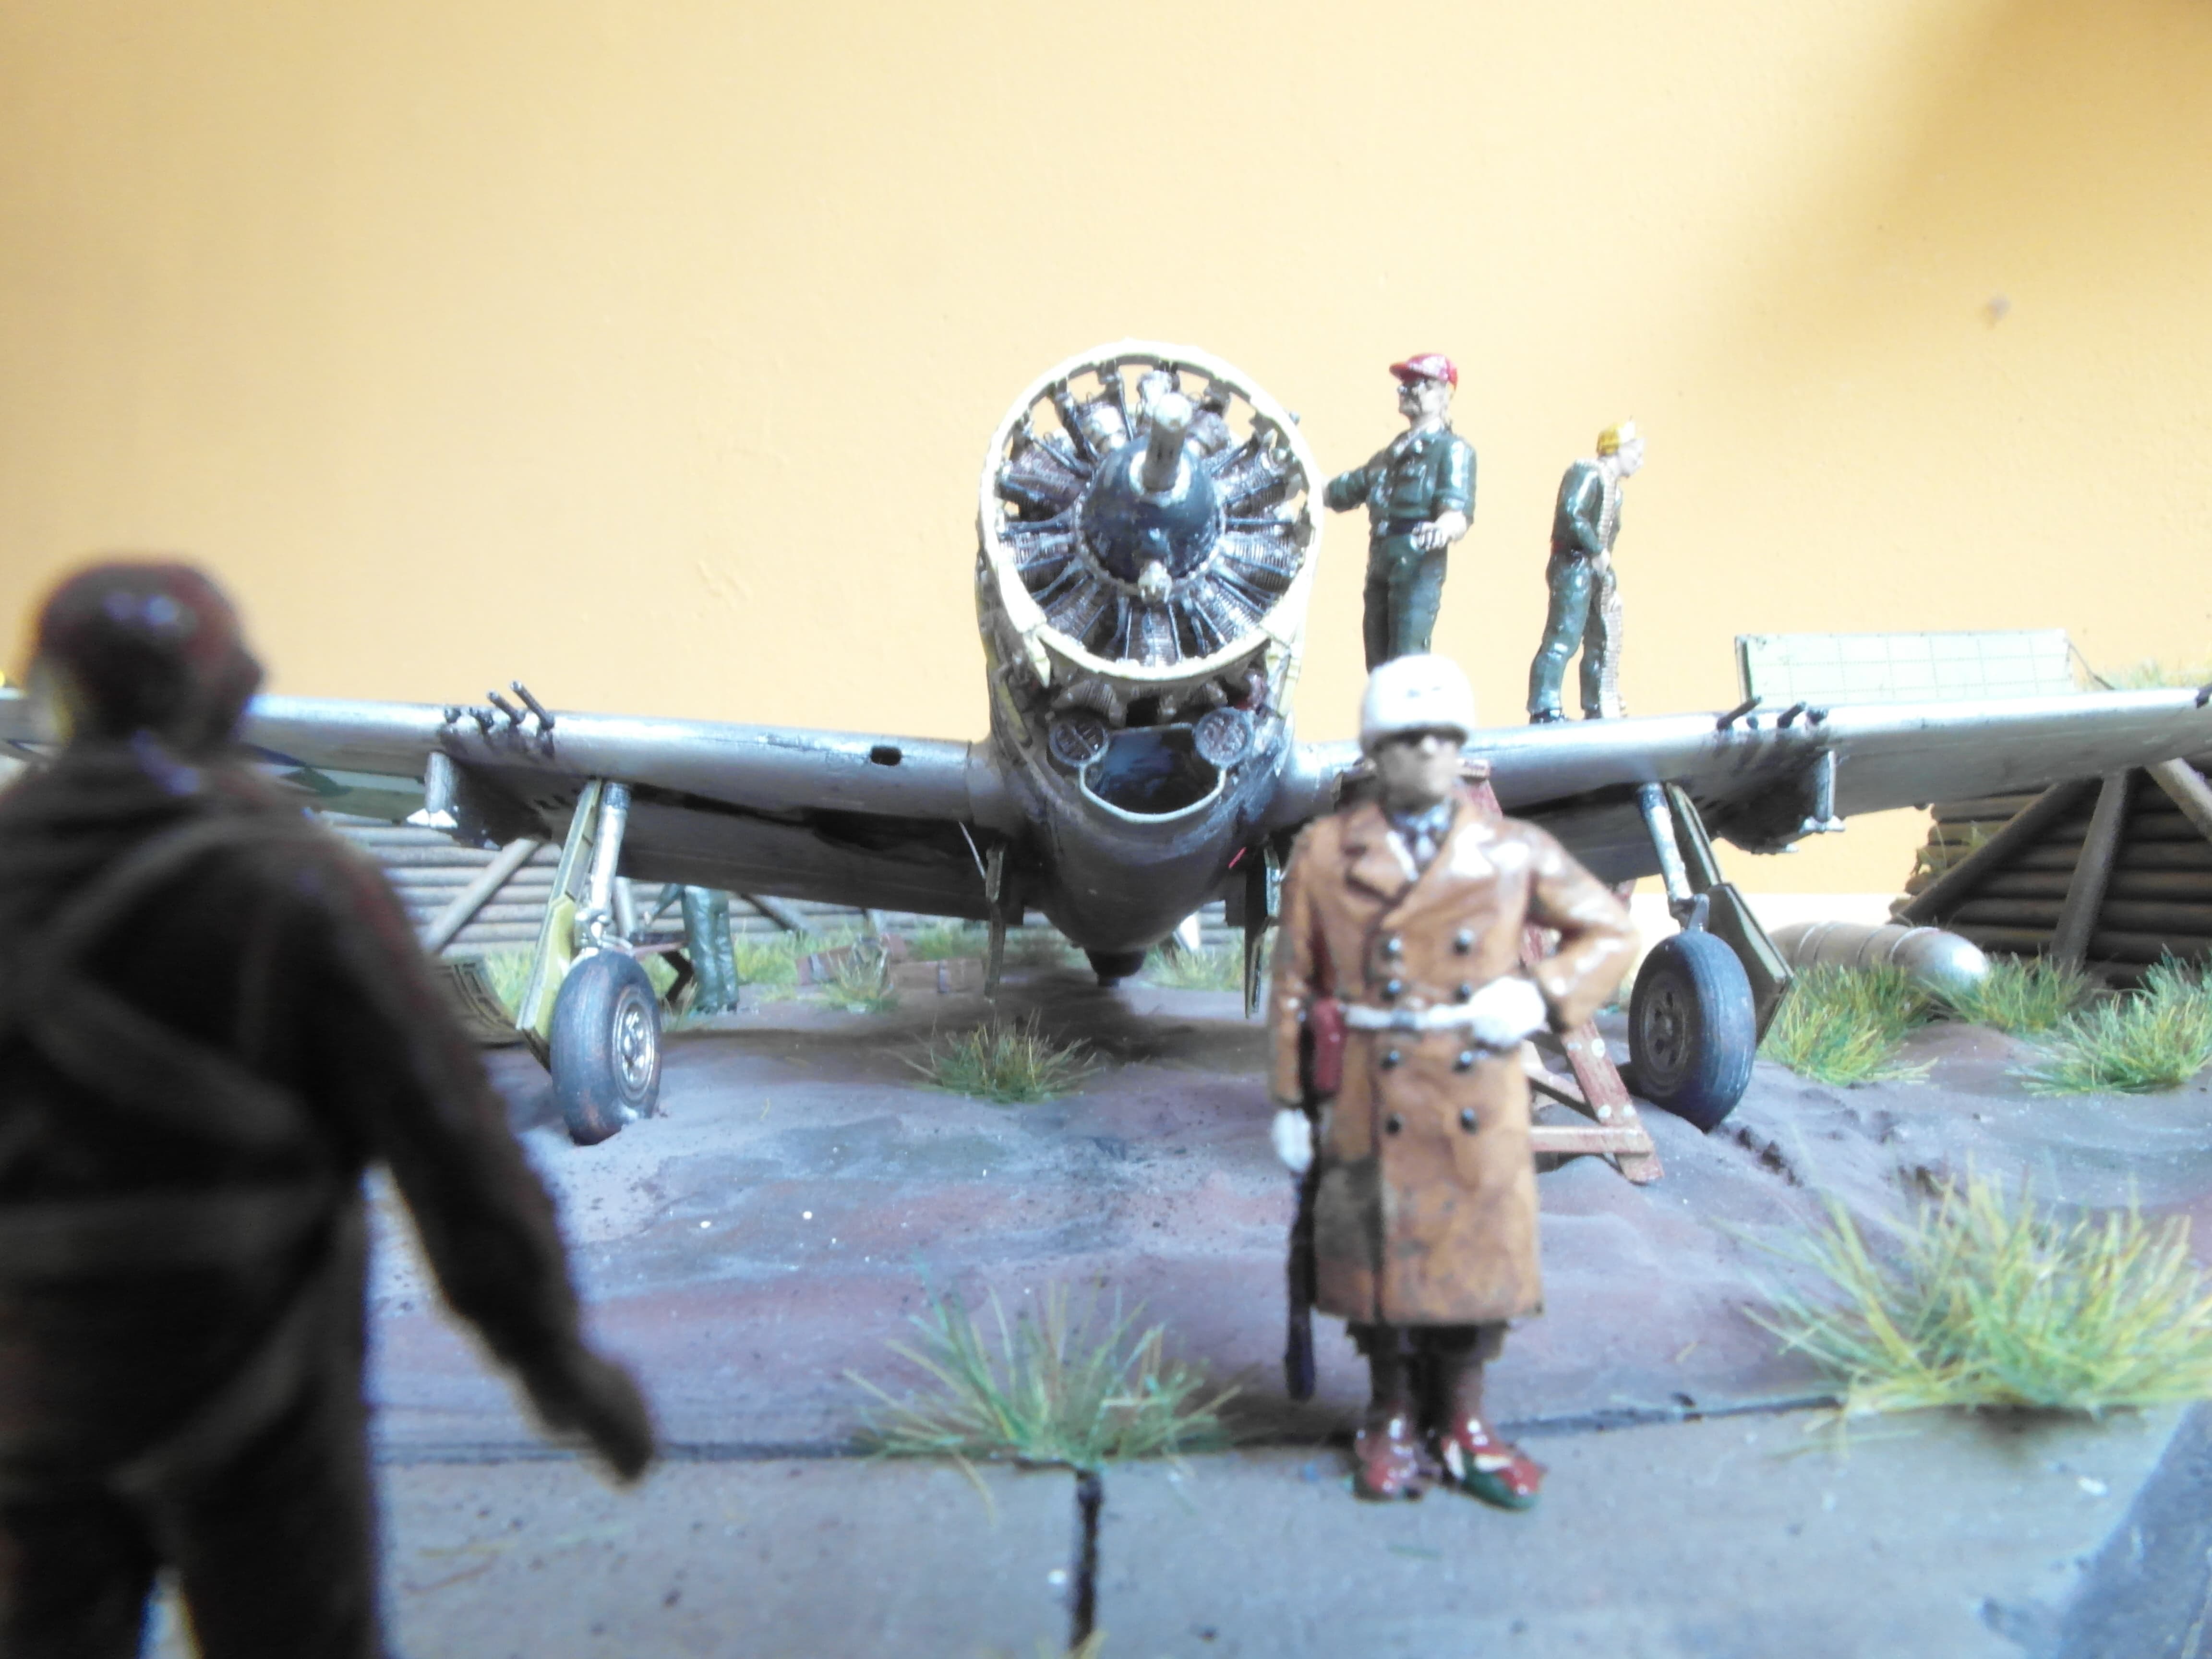
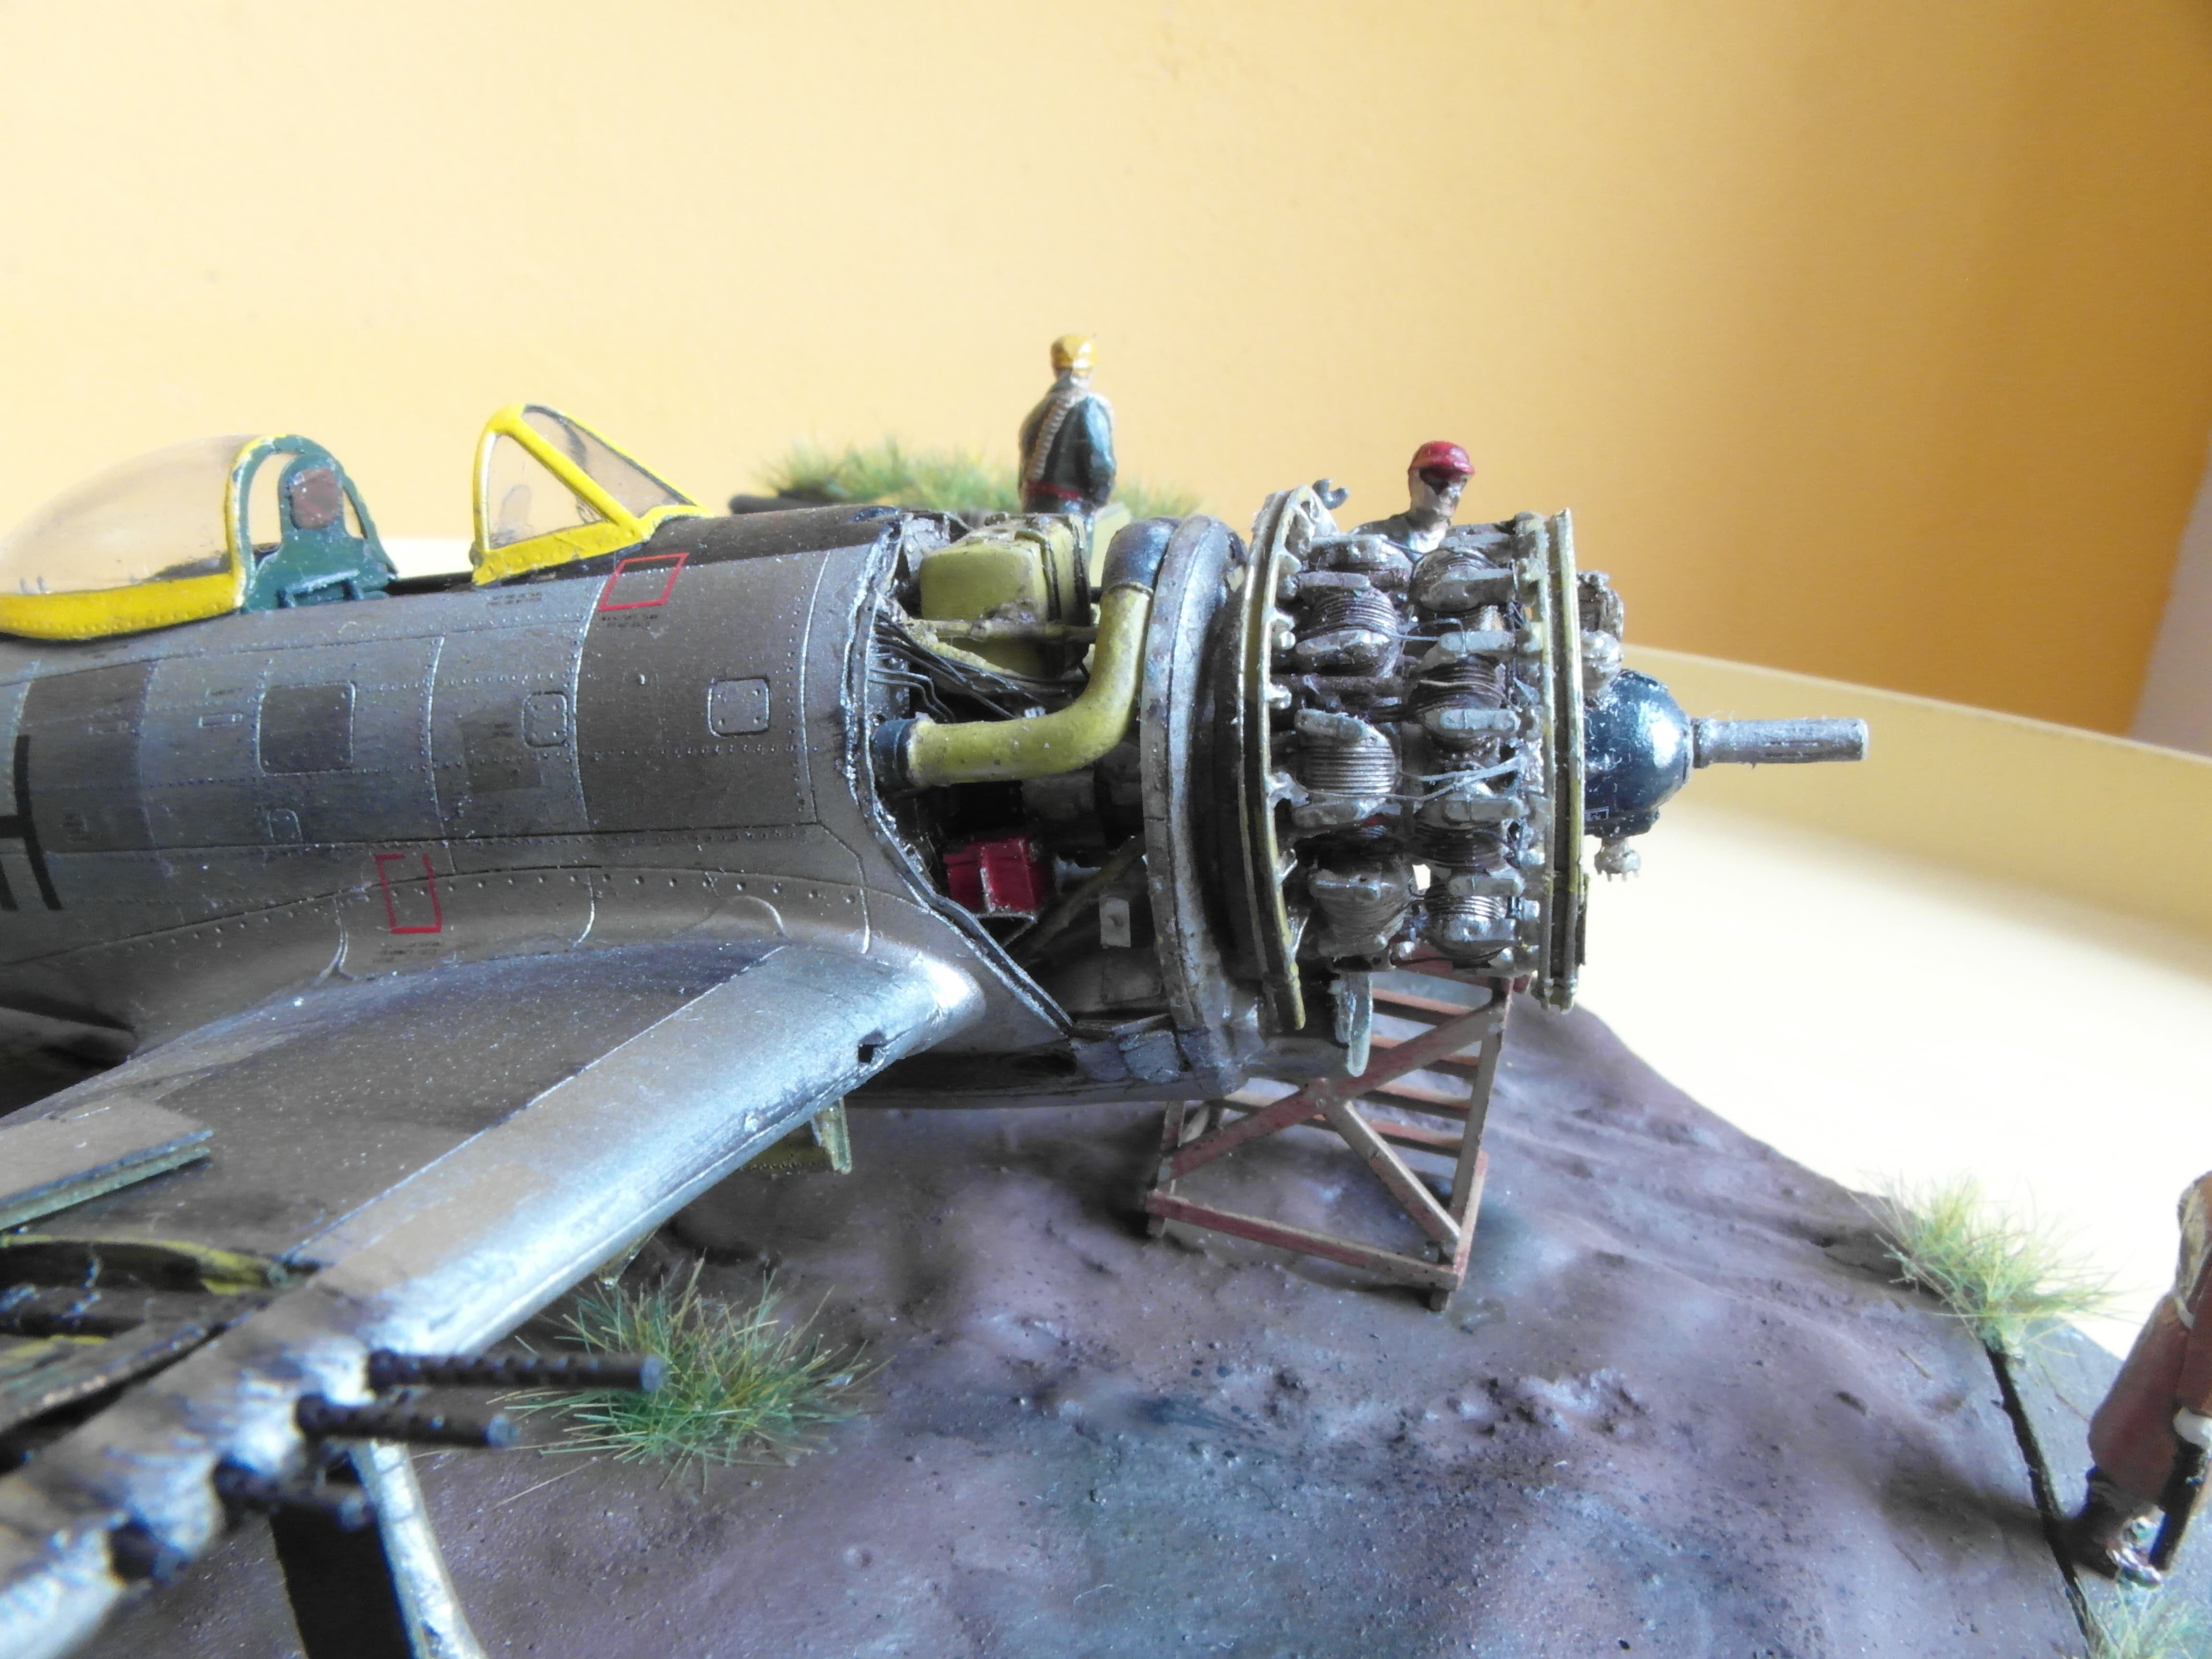
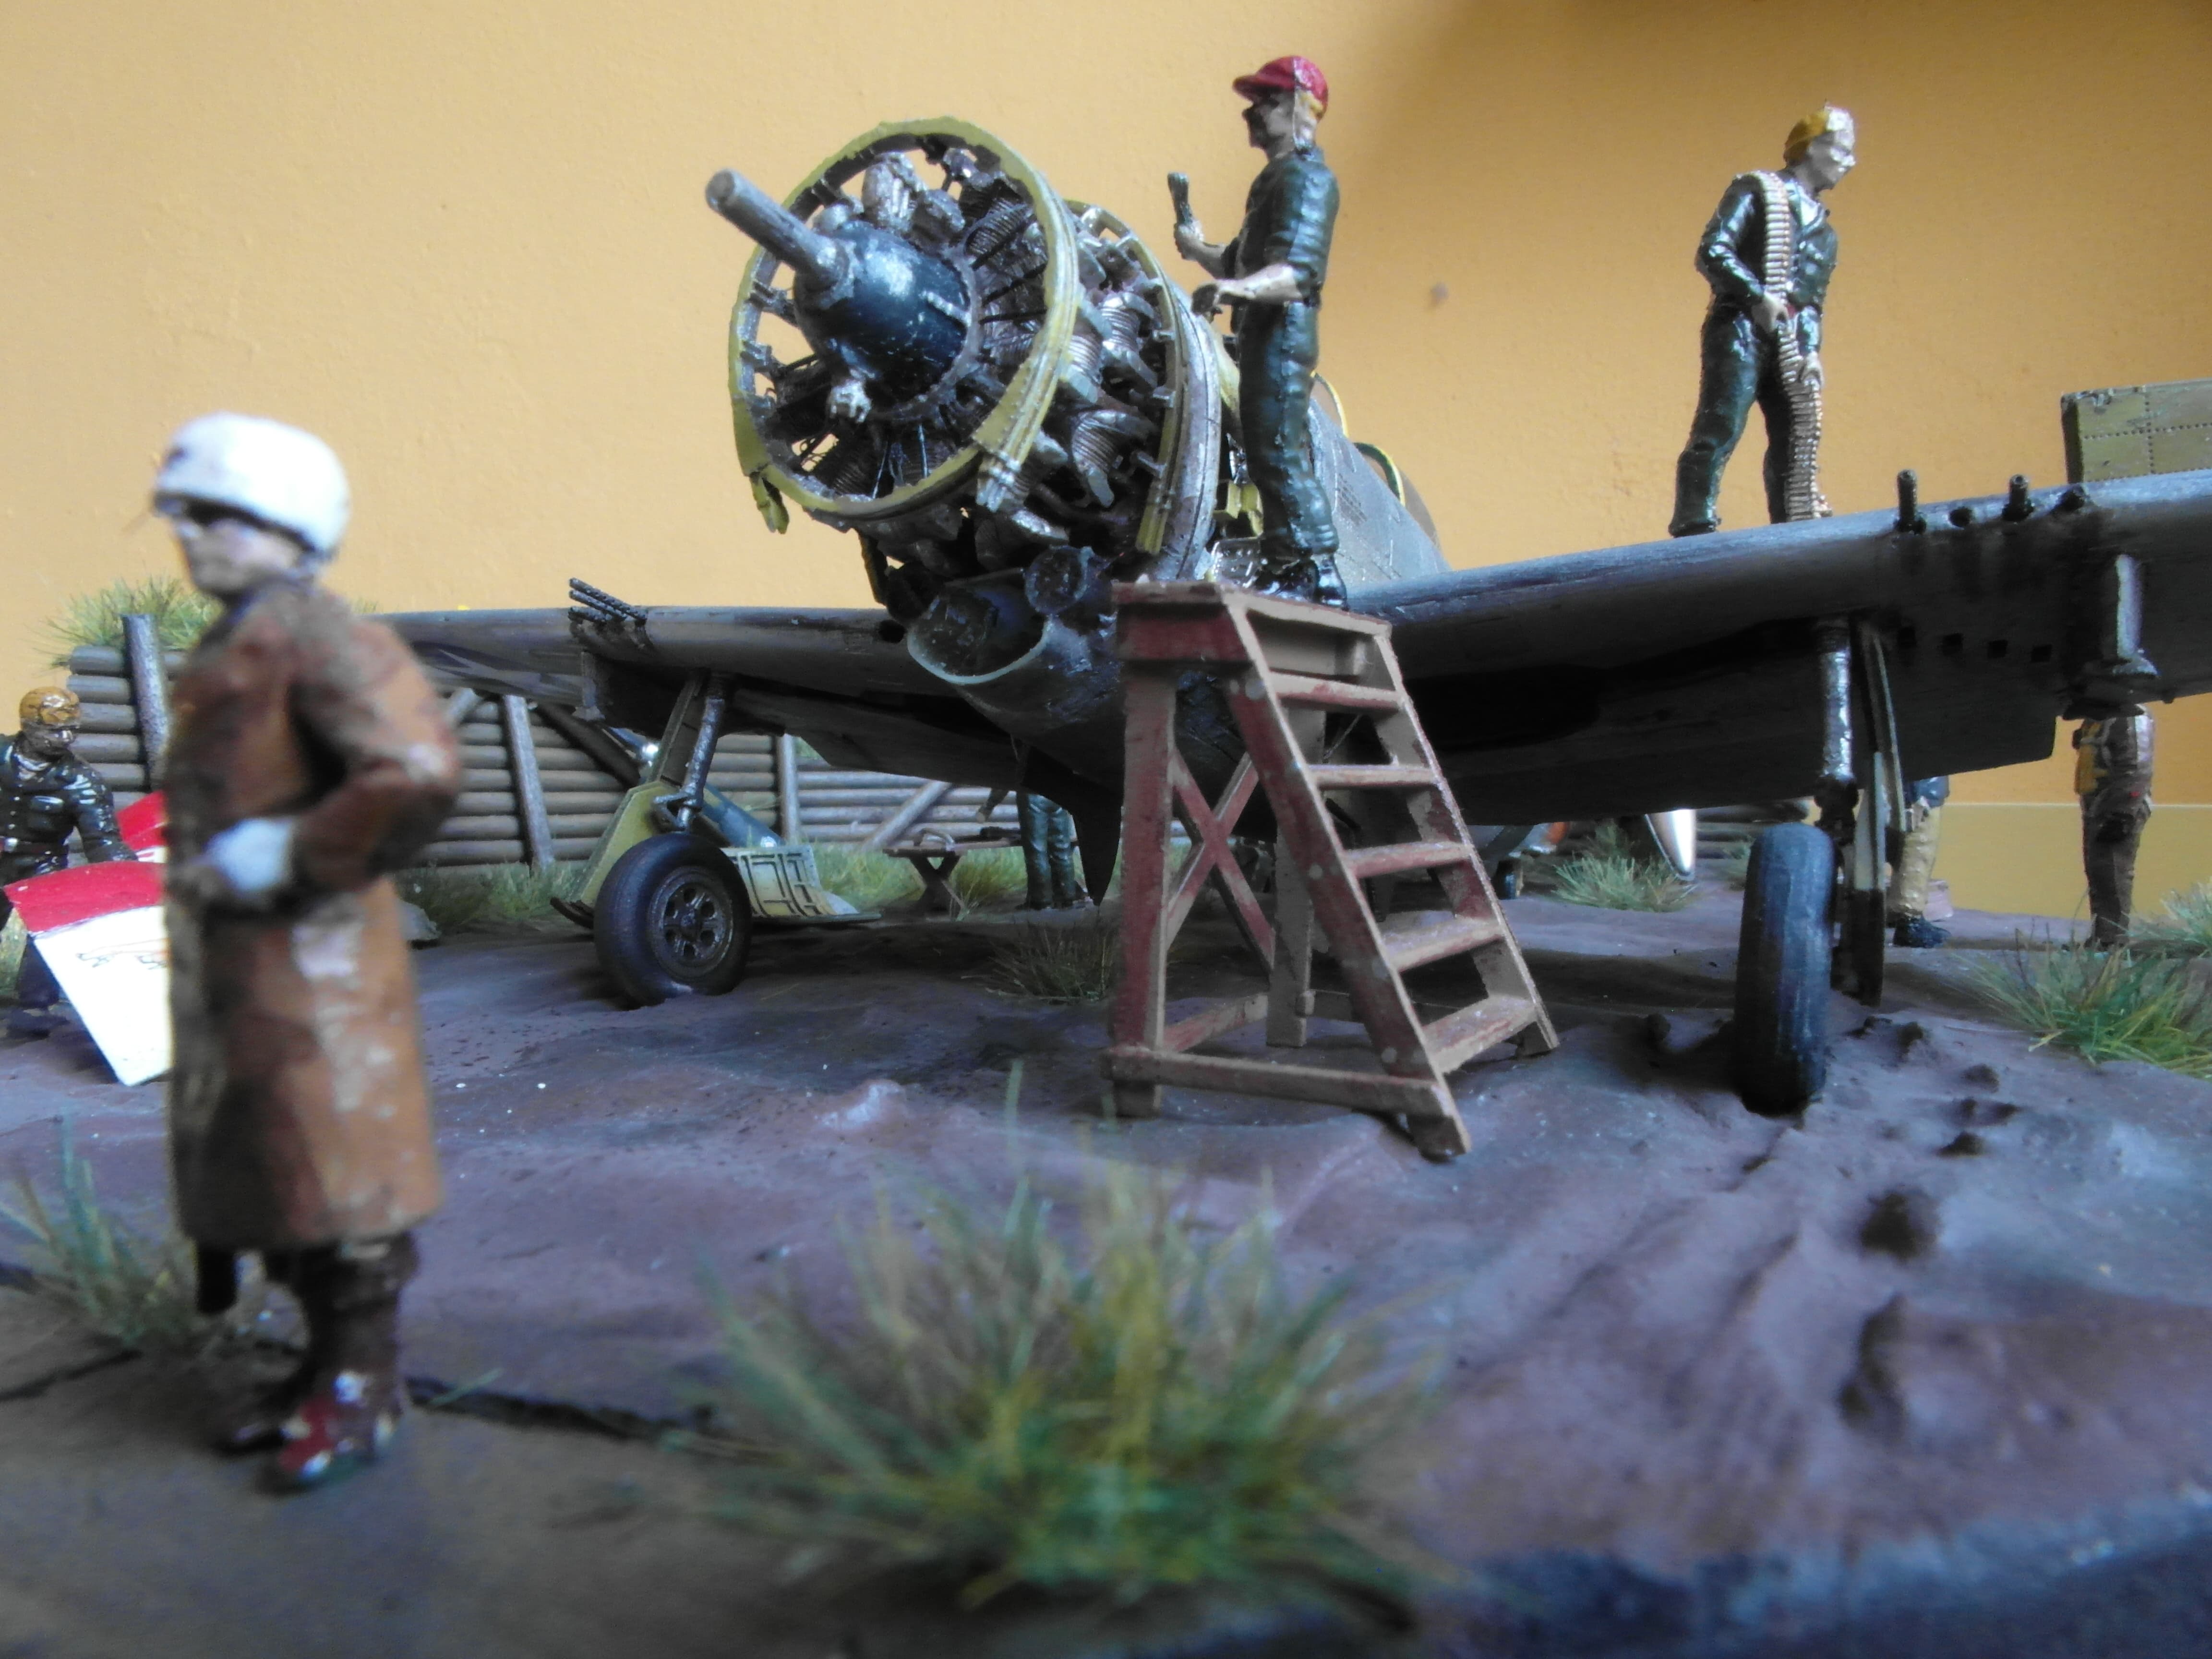
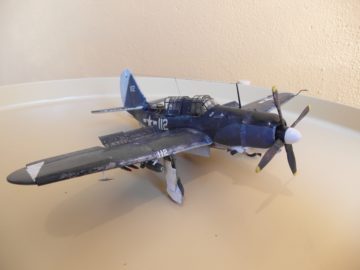
The engine is definitely the showstopper of this diorama. It is very detailled with a lot of parts. The fitting was mediocre however. It was quite difficult to line the pistons up properly. The exhaust was also a complete mess, requiring a lot of putty to pretty much remould the underbelly of the plane to make it look decent. The way the instruction manual was drawn made it very unclear as well where small parts should be attached. Only with photo’s from an actual Thunderbolt was this doable. The ring that loops around the rear pistons was also a nightmare. The hooks don’t even come close to lining up with the piston heads, so in the end I choose to just jam it in there. It’s not too noticable unless you know what to look for.
The Helen Jo
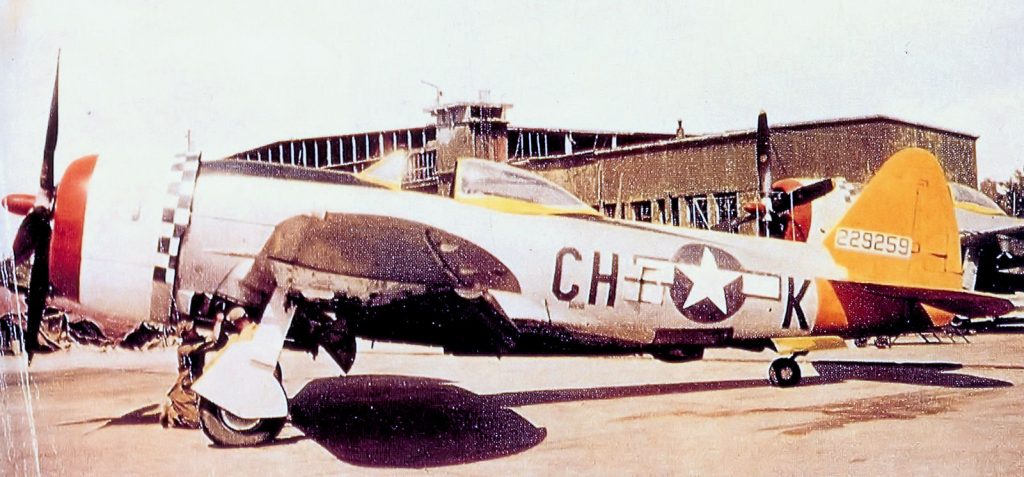
Source: Wikimedia
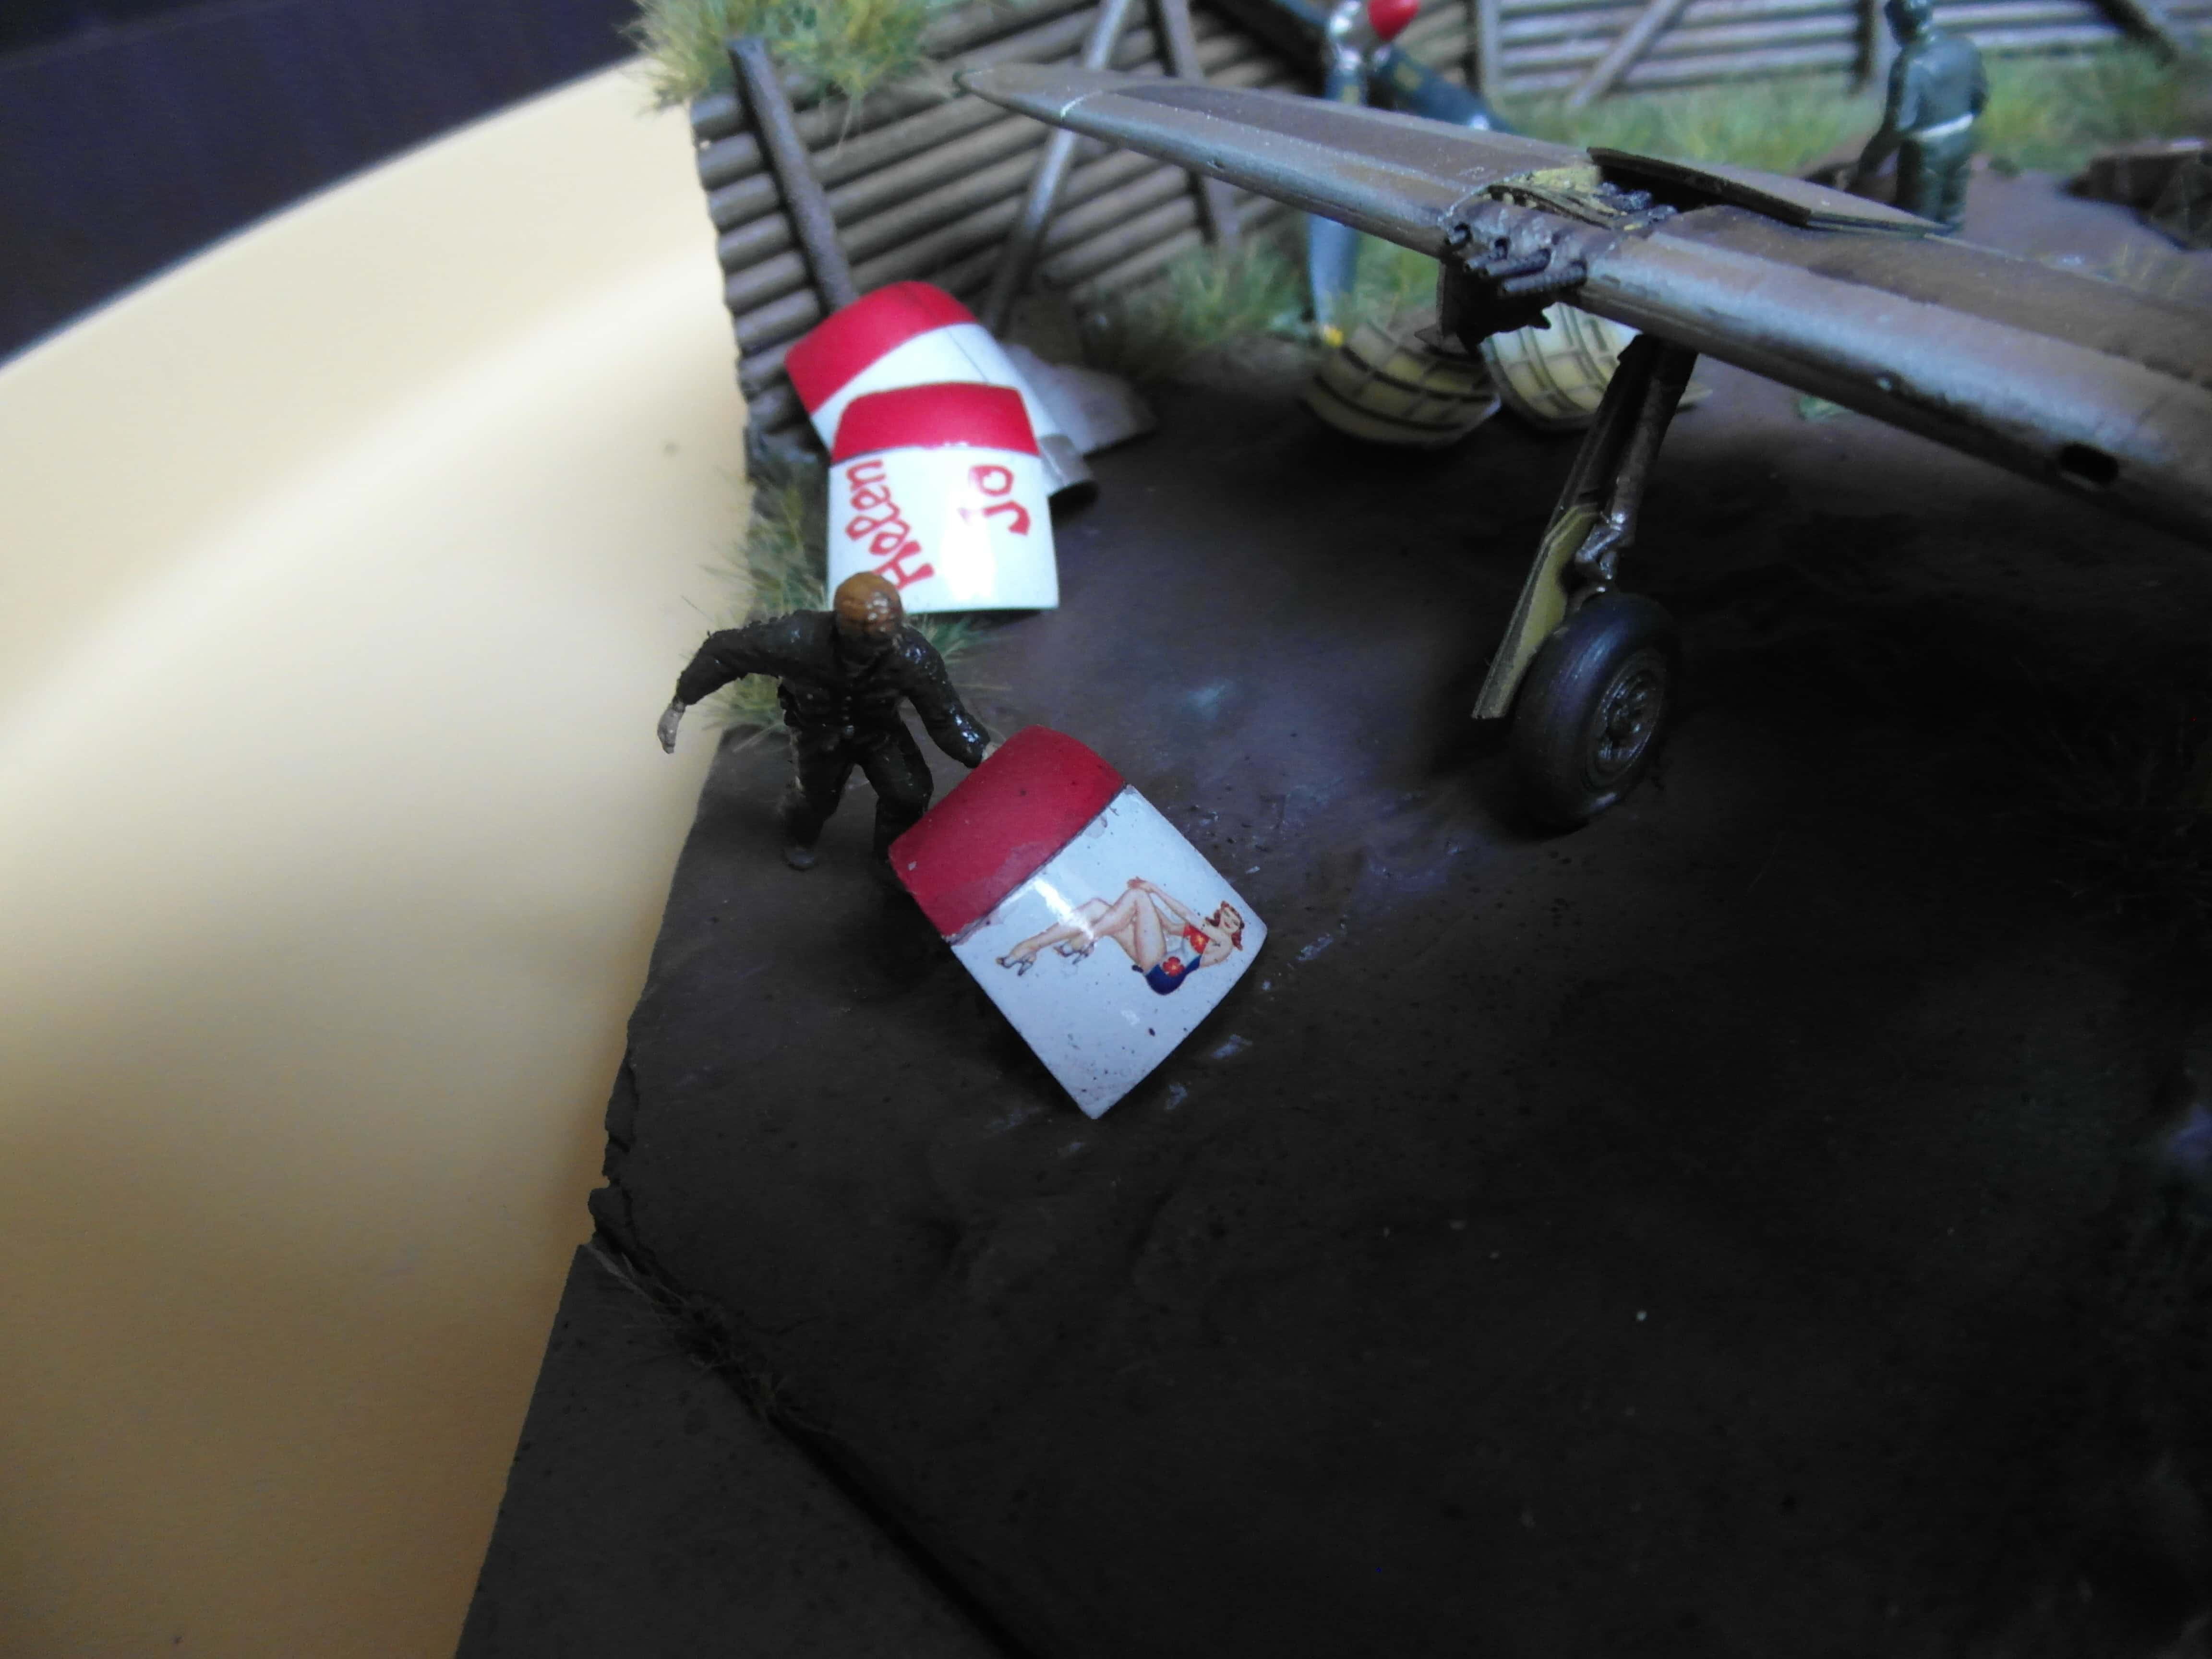
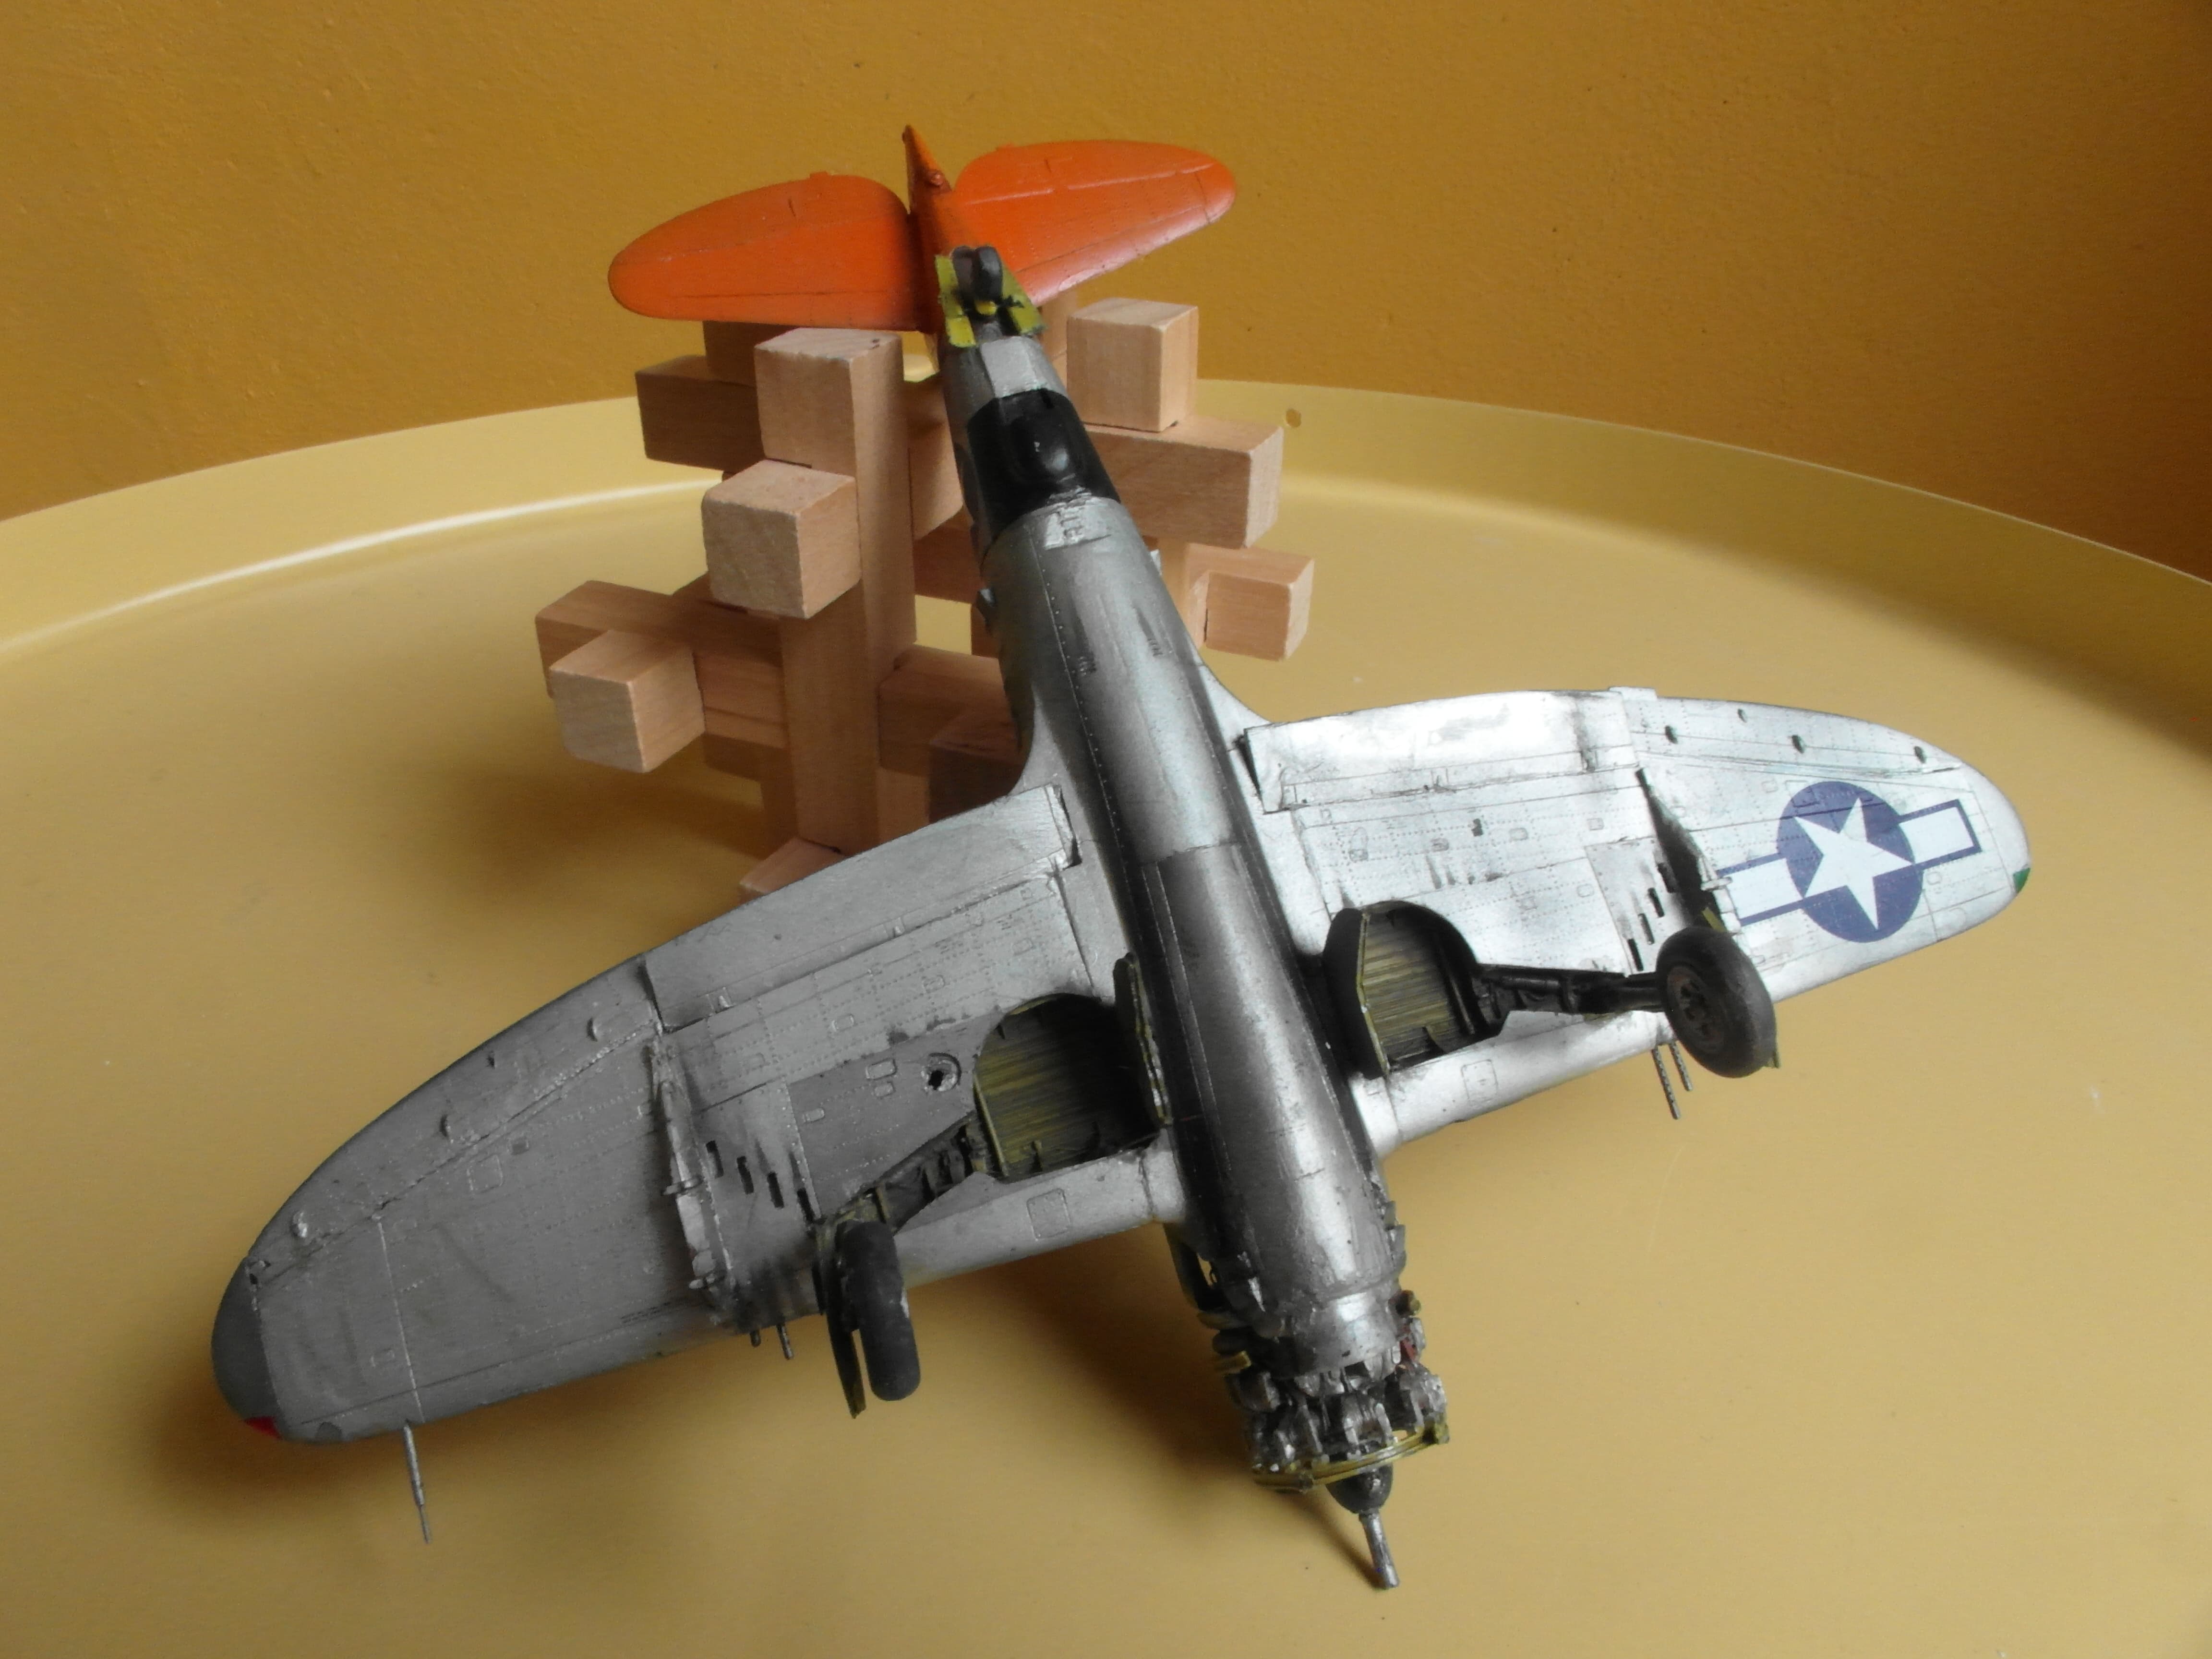
Because I was going all out anyway, I bought some new decals too. Because the engine covers are all removed, I wanted to have an options where the pinup would fit nicely on a single cover. I also wanted to have it have some nice colour variety. In the end I choose P-47D-28-RA 42-29259 “Helen Jo”, of which Kits-world made a nice decal sheet. Because both the revell kit, the academy kit and the kit’s word sheet missed the smaller decals, I choose to purchase an HGW sheet too. I read about these earlier and wanted to test them out. They’re sheets where the text is below the carrier film, which you later remove. The concept is nice and when succesfull you end up with some very nice decals, however the resolution was kind of low, and sometimes it just didn’t stick properly.
The diorama
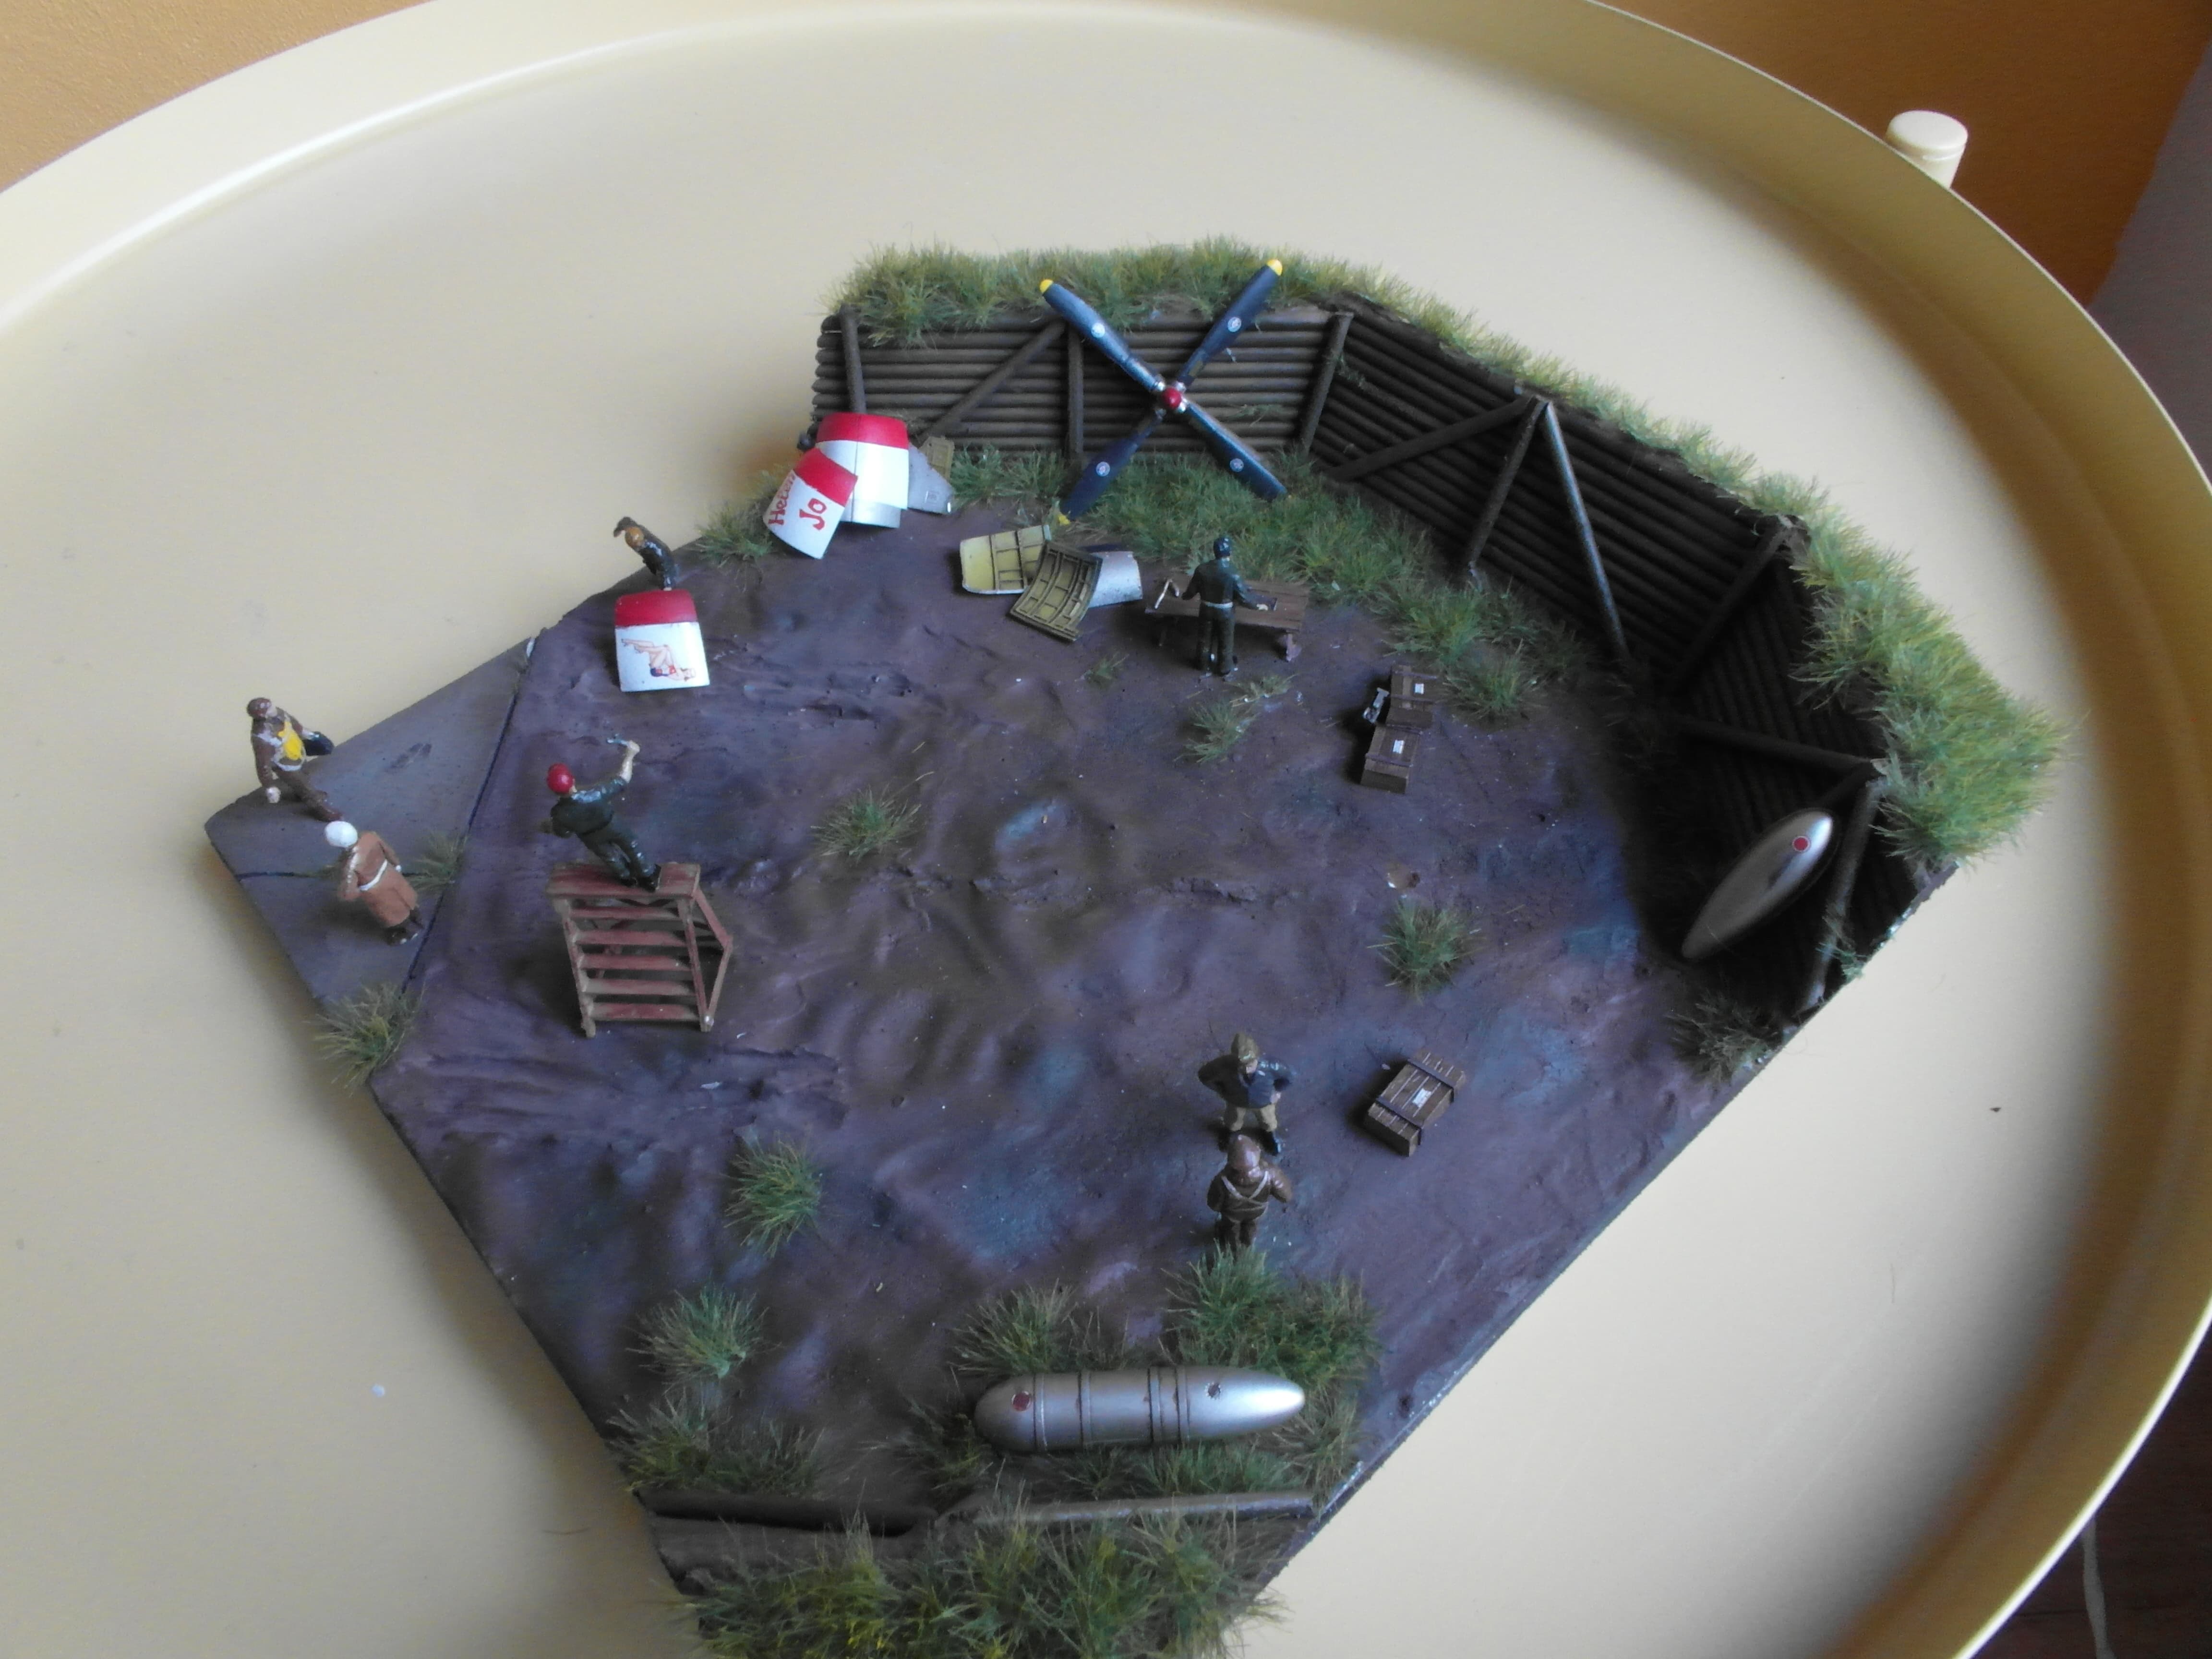
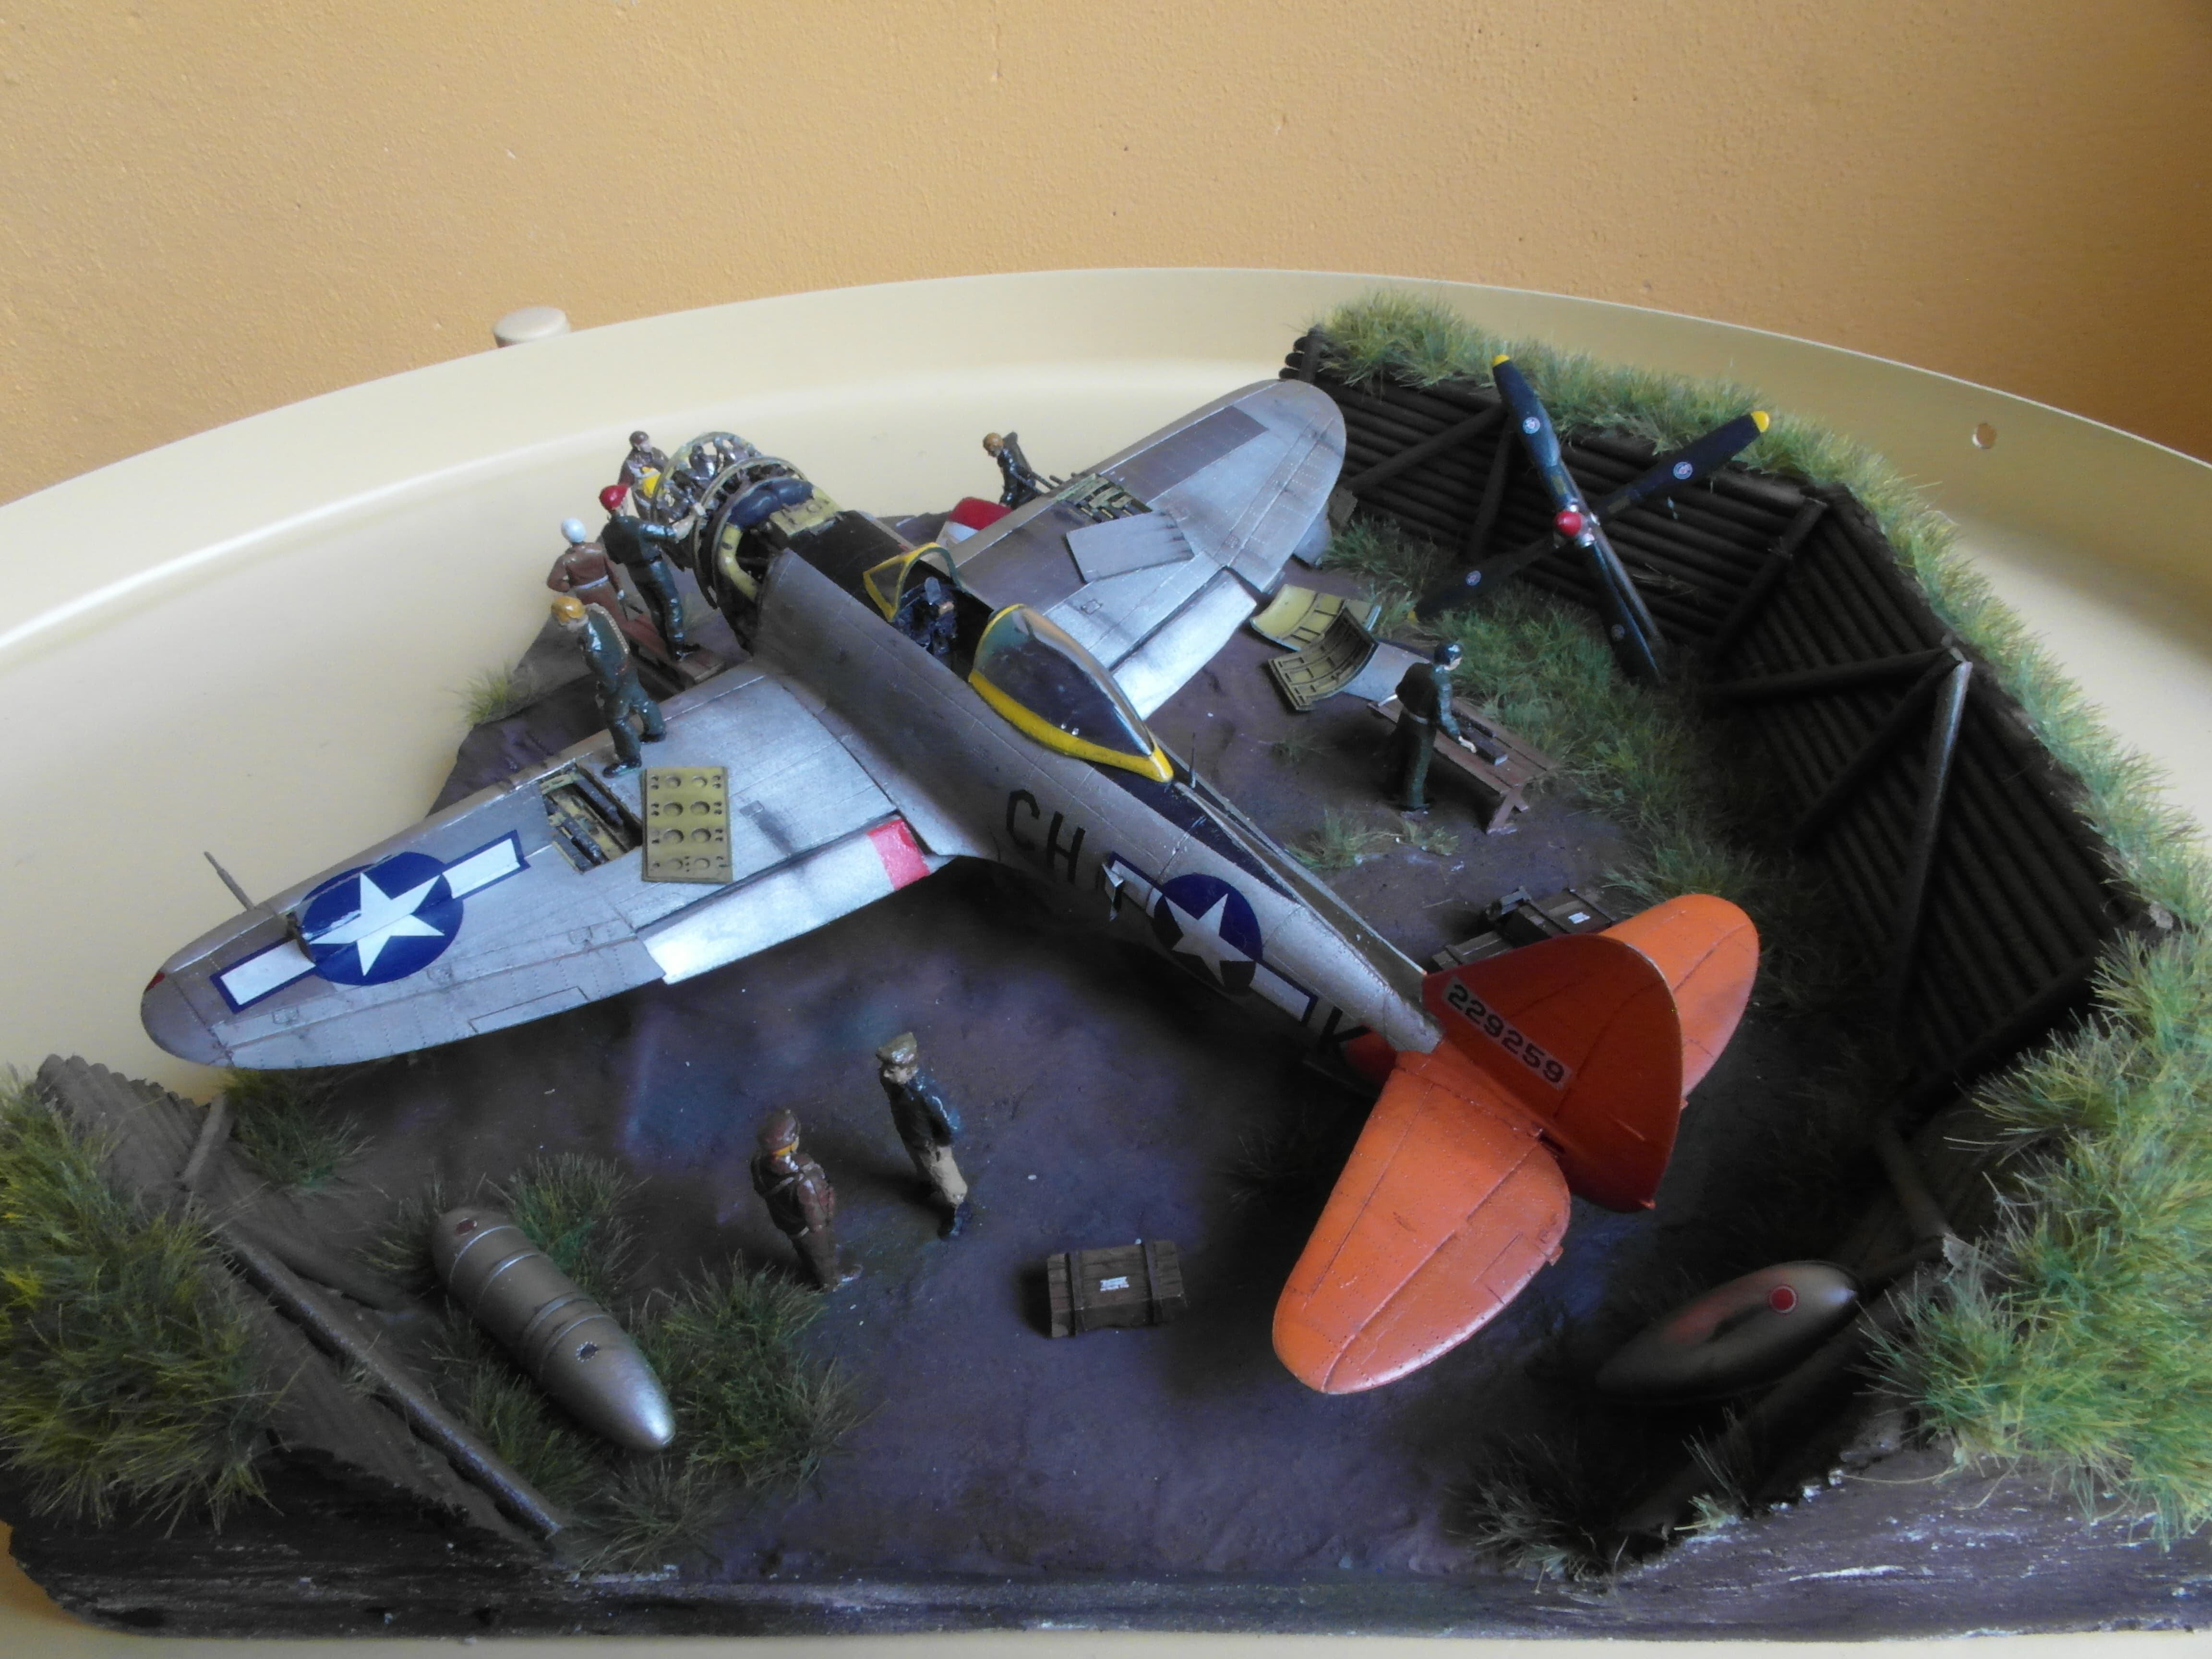
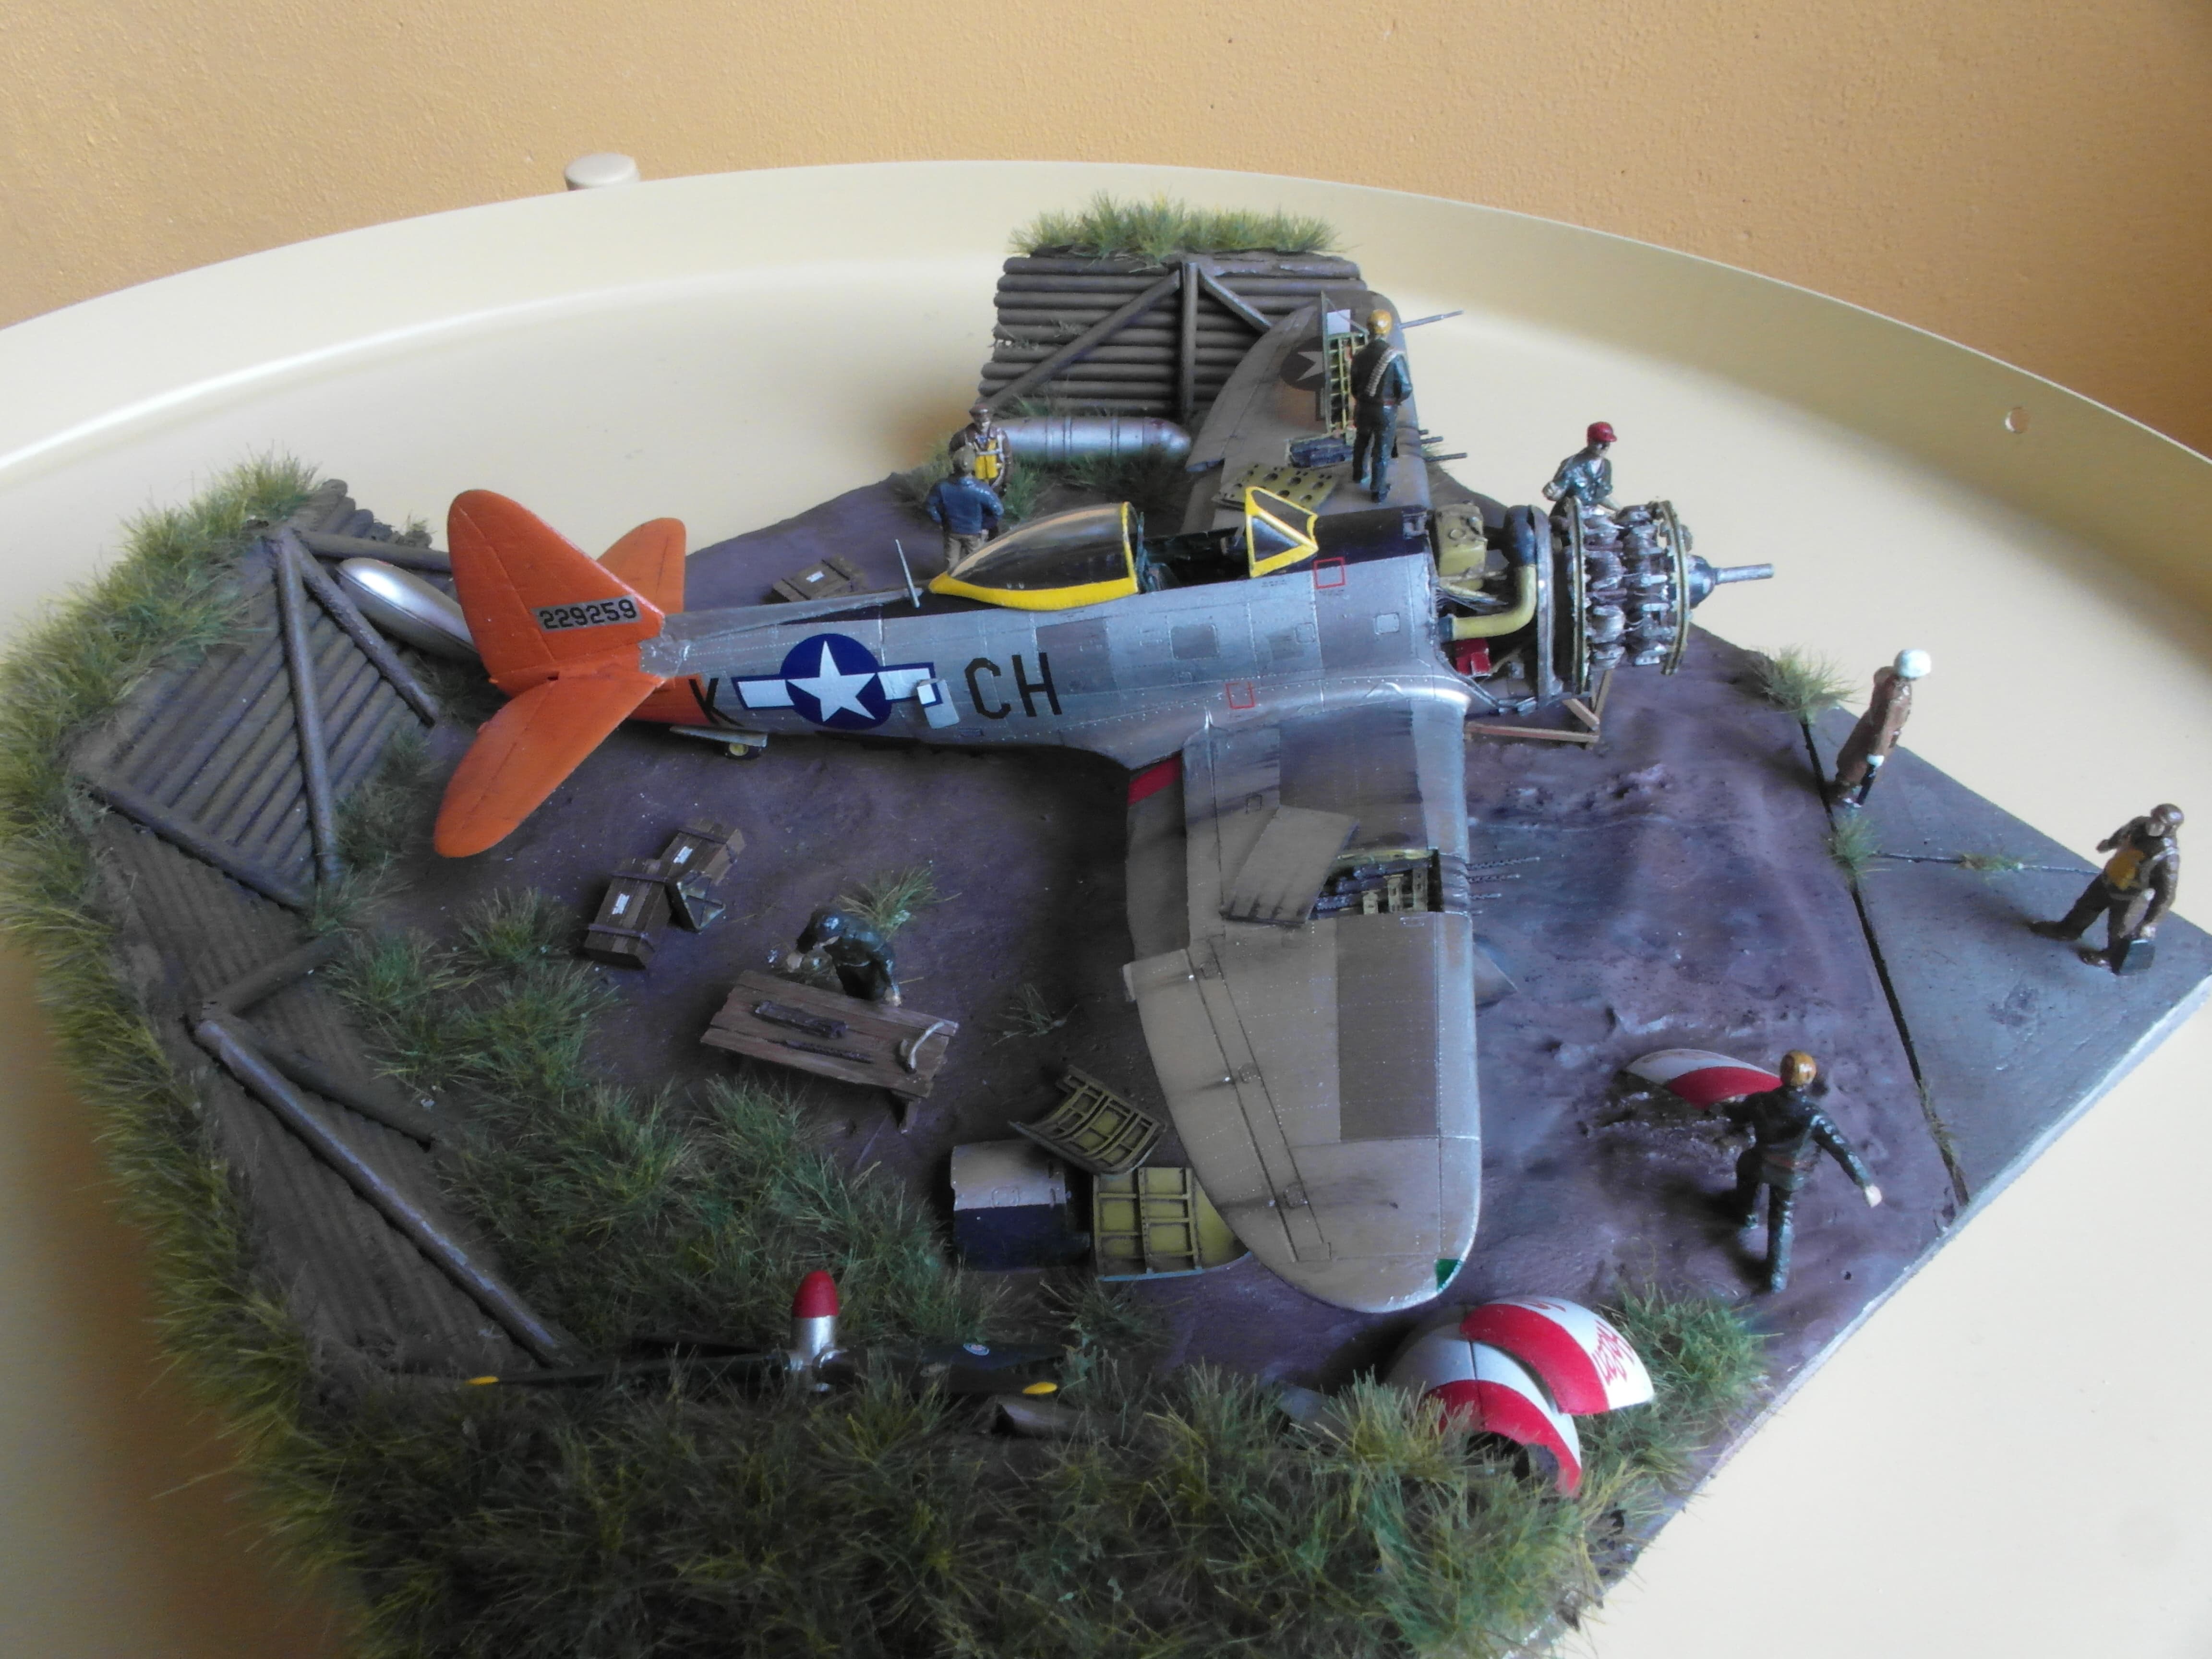
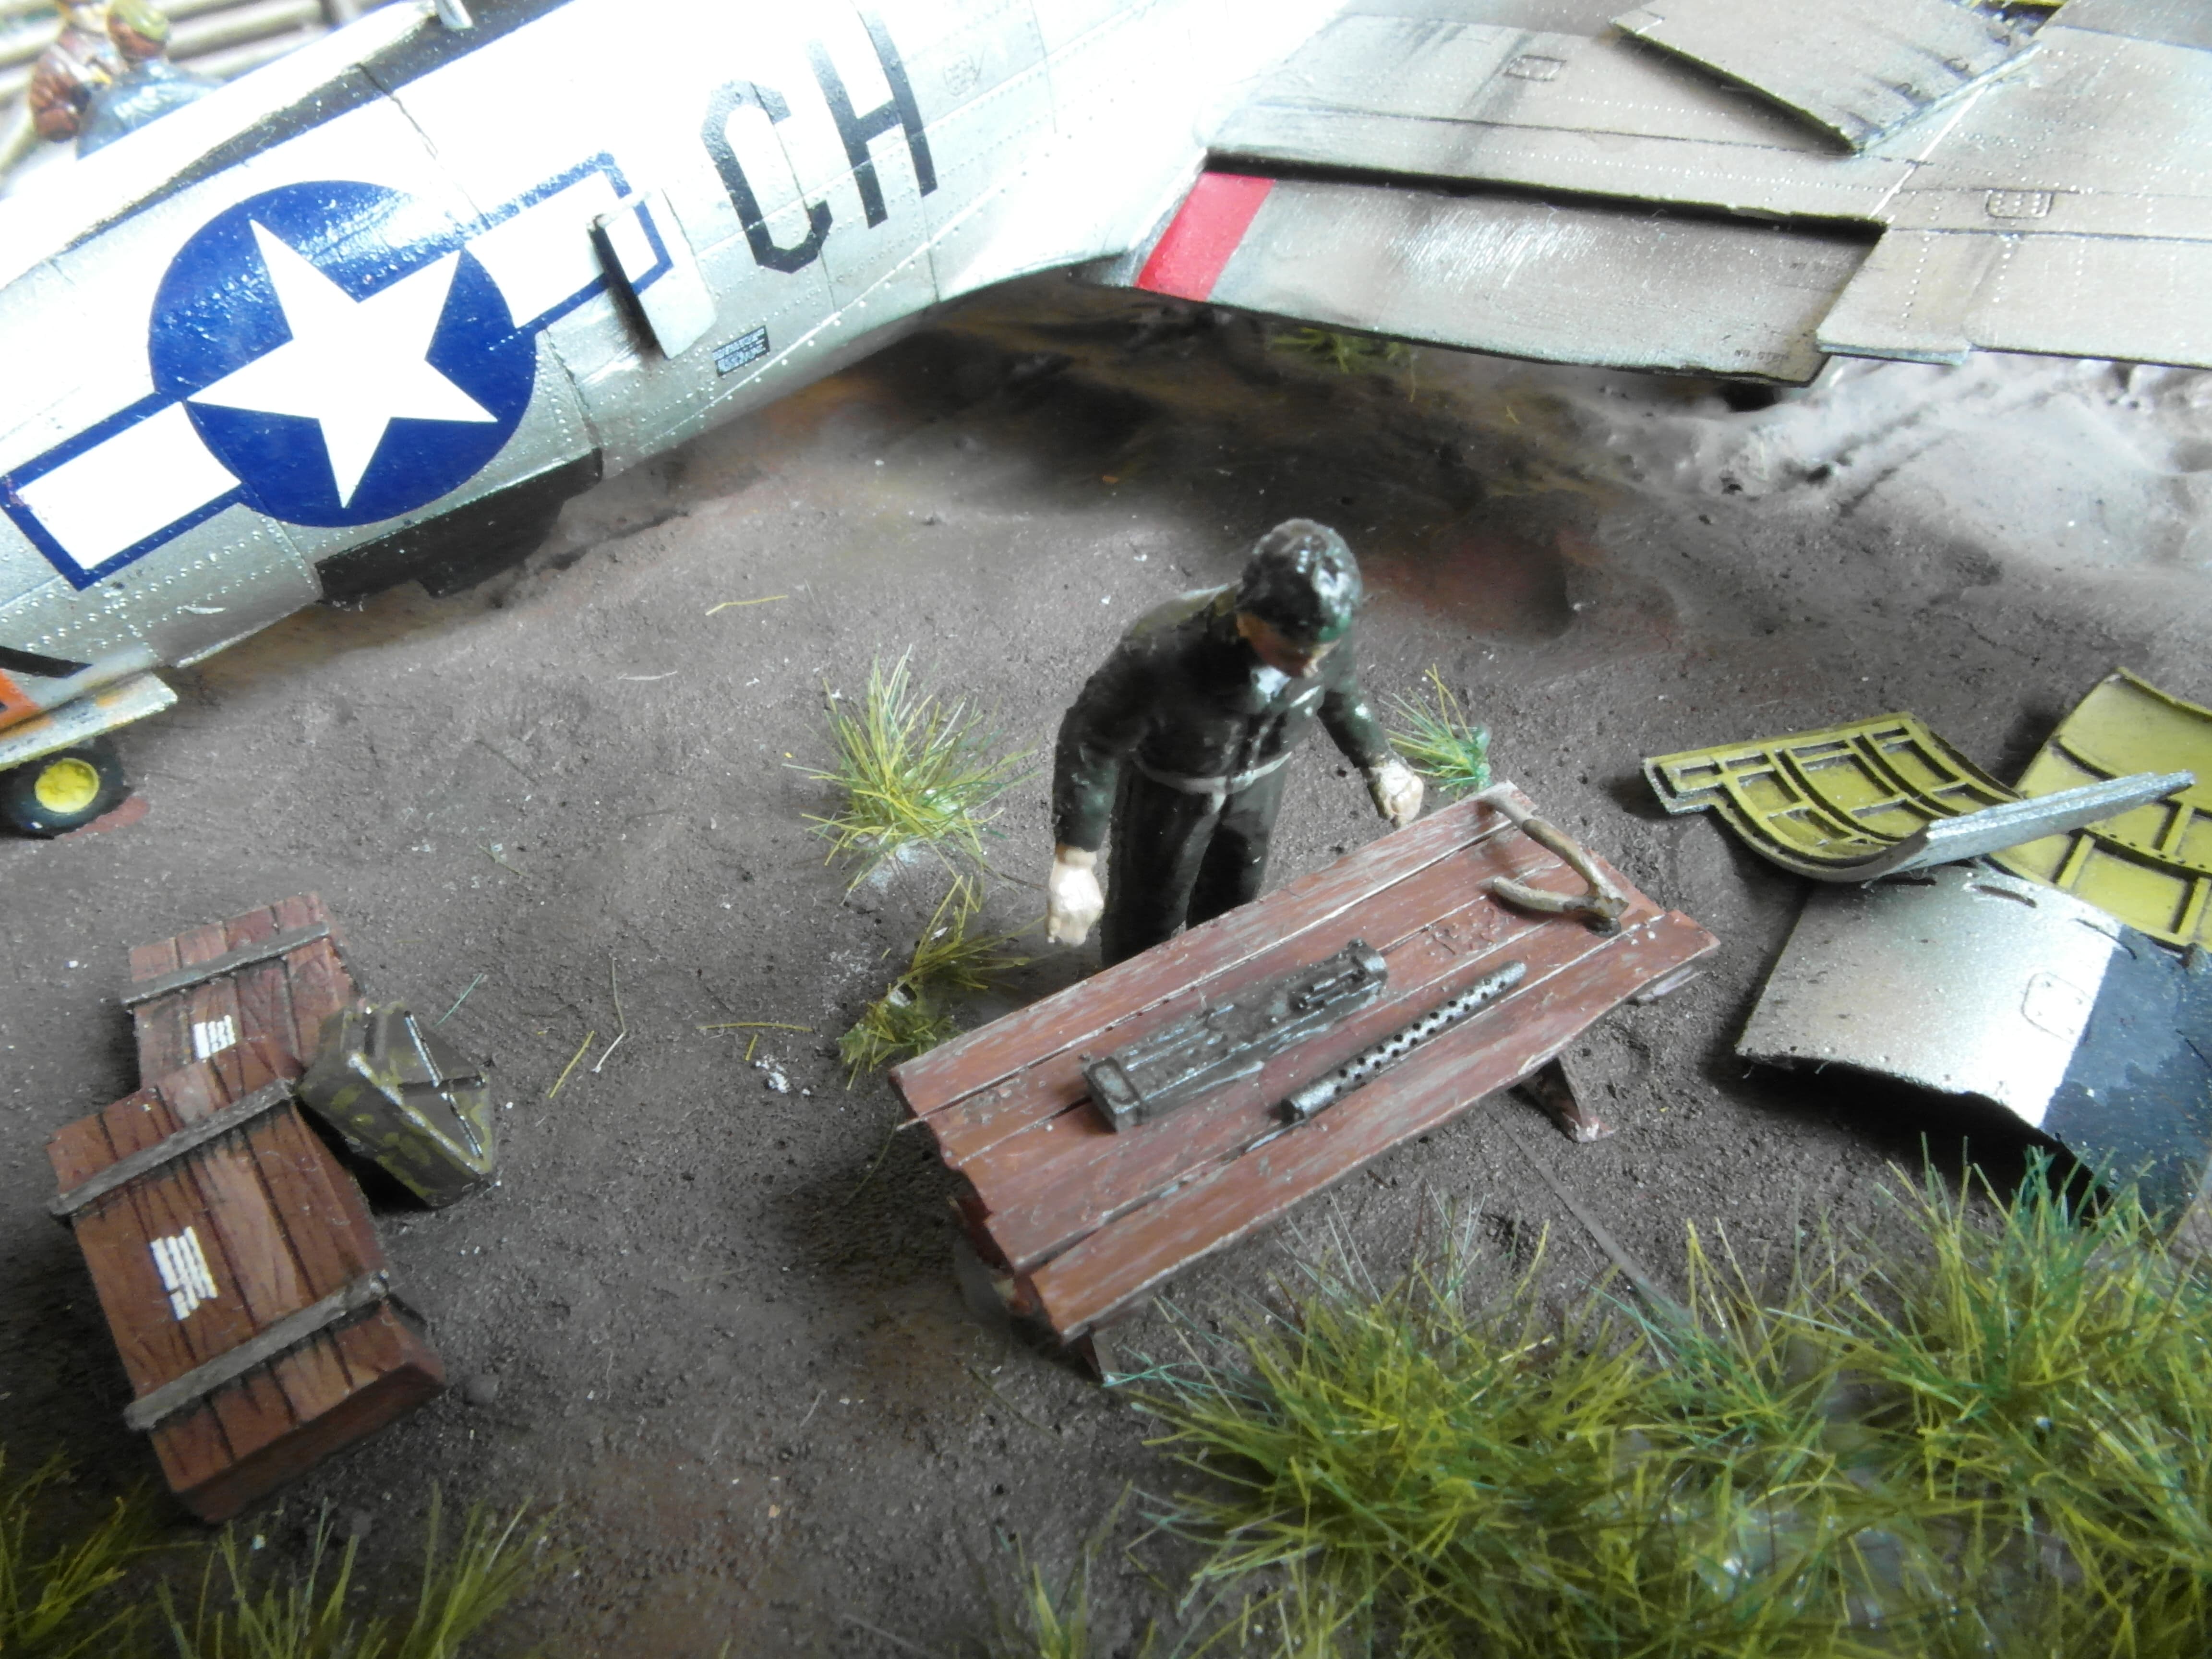
The rest of the kit went together relatively smooth, and when the plane was finished, it was time for the diorama. I wanted to create a revetment with a dirt floor, wooden walls I started out with two square pieces of isolation foam glued on top of each other. Around that I placed the walls in an octagon shape, slightly larger then the plane. in the open corner I scribed a piece of the runway. After that I covered the walls with wooden skewers. Then I recreated the dirt with thick plaster. This required a few layers in the corners to prevent the plaster from flowing too much. I also tried to create some wheel tracks. After that the entire model was painted in various tones of brown for the dirt, green brown for the walls and gray for the concrete. Drybrushing and washing was also done to the walls to create the illusion of some older, weathered beams. After that modelling grass was applied. I purchased some pre made grass tufts, which I glued with woodglue to the base. Full coverage outside the revetment and some at the sides inside.
The figures are some old Airfix USAAF Personnel. They’re nicely moulded, but are made from some horrid soft plastic that made it impossible to remove the moulding lines.
The wooden ladder comes from my Aoshima Ki-61, which came with more ladders and ground than I knew what to do with anyway. There are more various components littered around the base which came from my spare parts pile.
The table I made myself from some styrene sheet.


Very cool Emma! I enjoyed reading the article and the HR pictures. Keep up the good work!